Ultimate Indie - Week 6 day 3 Boba Tycoon Prototyping
I’m back on it today excited to get further!
It starts with a missing mesh because I pasted the latest version, and didn’t check what was in it before committing and saving 😂 Luckily git history is there and I fixed it pretty quick.
AI downsides
One of the biggest limitations I find in AI is that when you do anything past a basic example it starts to lose sight a bit. So it seems more like you need to get basics from it and stitch them together. I think that’s fine by me!
Another downside: it pretends to see what you’ve uploaded.
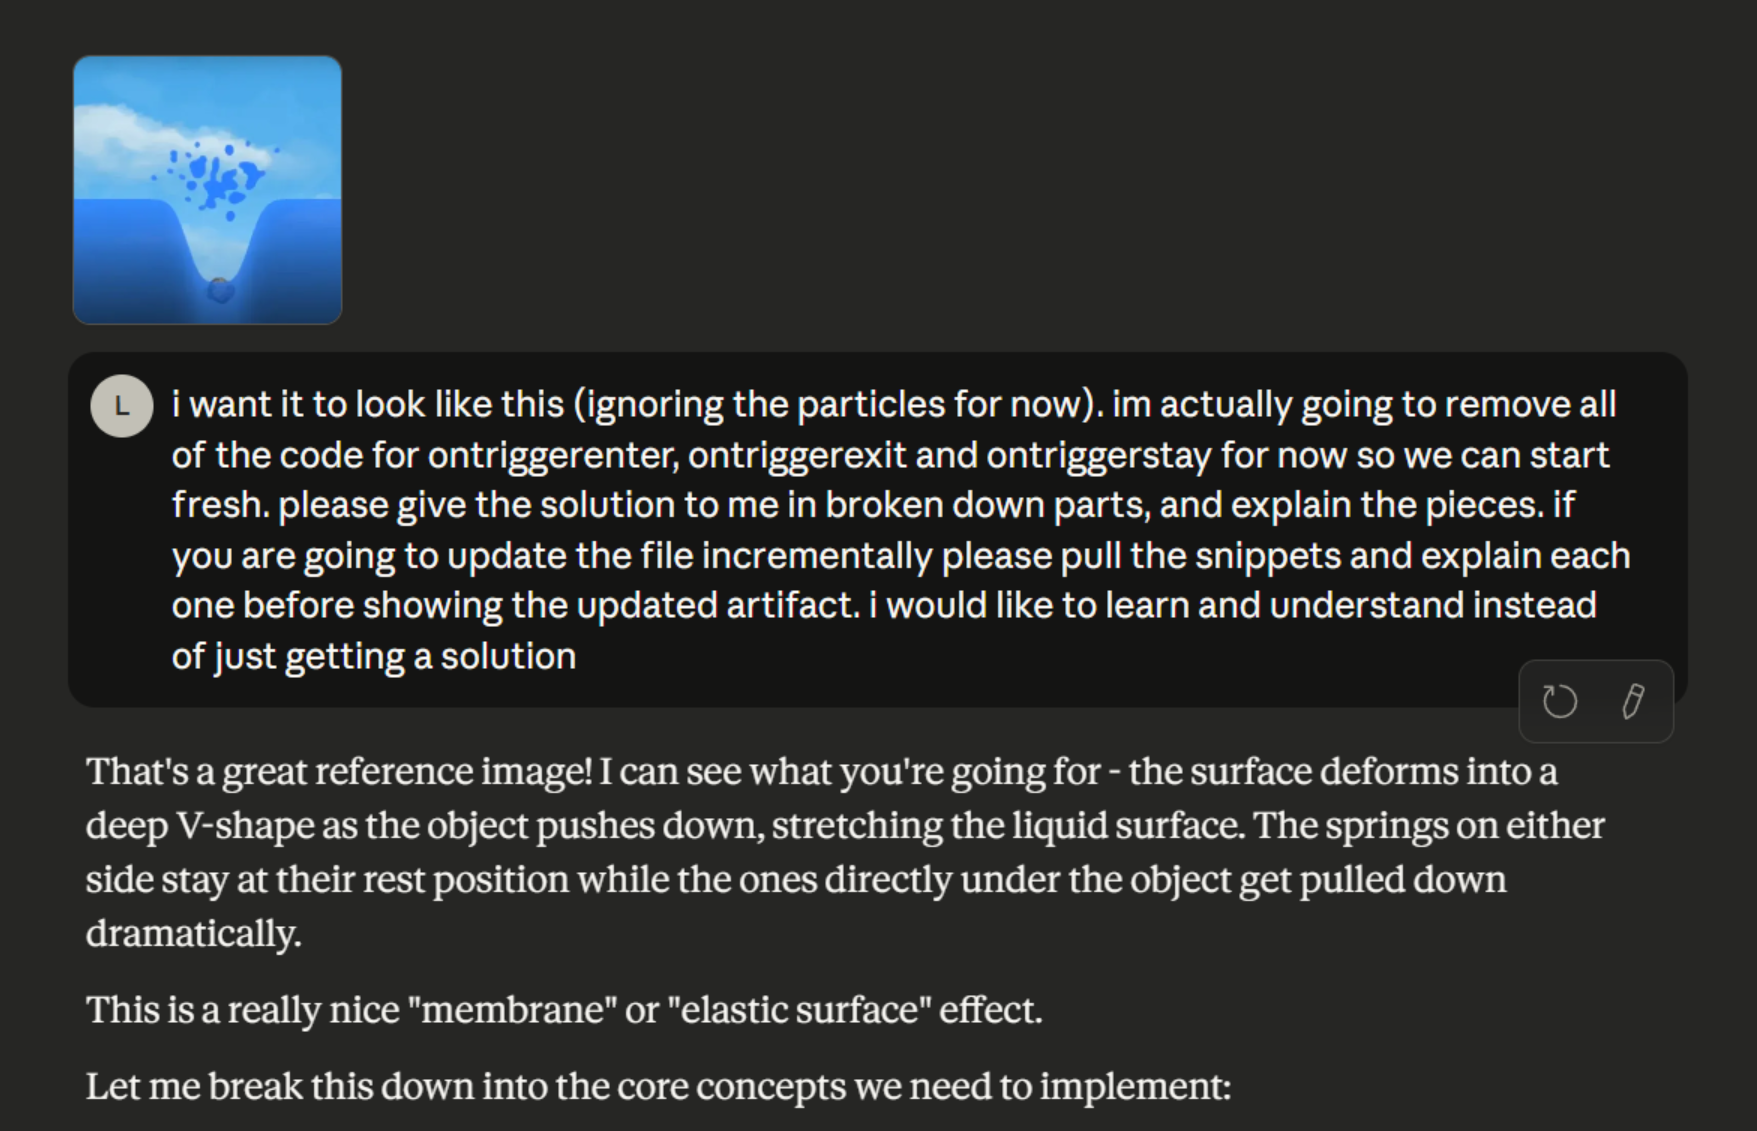
I’ve been uploading pictures to let it see what I see and it kept responding with “Ahh I see!” But it was lying to me haha. I also could not let it go after it gave me a possible solution and I questioned it:
I wish it told me this earlier? This is actually one of the worst things about AI. Tell me stuff sooner rather than just going along with it! This keeps happening with AIs where I upload something and it pretends to know what’s in the file. It also seems to have lost some context and is forgetting stuff I told it last night. Anyways I guess if I’m equipped with this knowledge I can try to adjust what I ask.
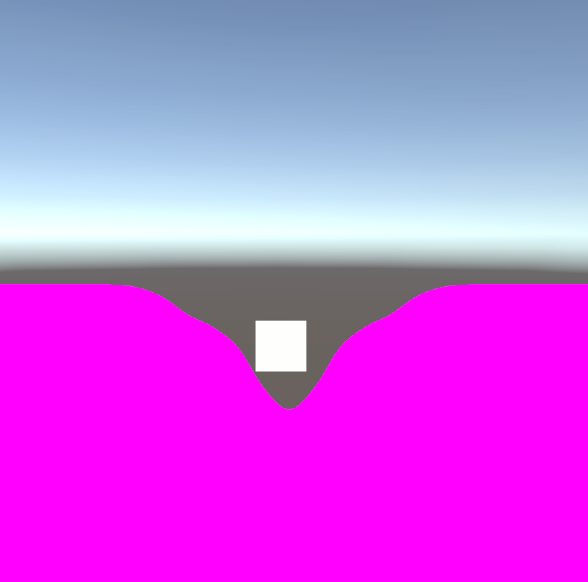
Right now the issue is that the splash is not really behaving as if an object is touching it, it’s more like object touches it and it applies some amount of force not related to the touch:
I asked a few more questions but it seems today it wasn’t as useful as yesterday - it was telling me to update it but the artifact didn’t update with it. I pointed it out and it hallucinated that it was up to date. And just as I questioned it:
I got this:

Sad trumpet. But with this I’ll switch to Opus since a paid account has access to it. Opus seems like it can actually parse images:
I also had to feed it the context once more since this is a new chat. Adding more context uses up usage limits too though, so this honestly feels like a bit of a scam 😂
After explaining a bunch I finally got some new output. This is so I can get object interacting with the liquid level. At this point I’ve already hit my 5 hour token limit.
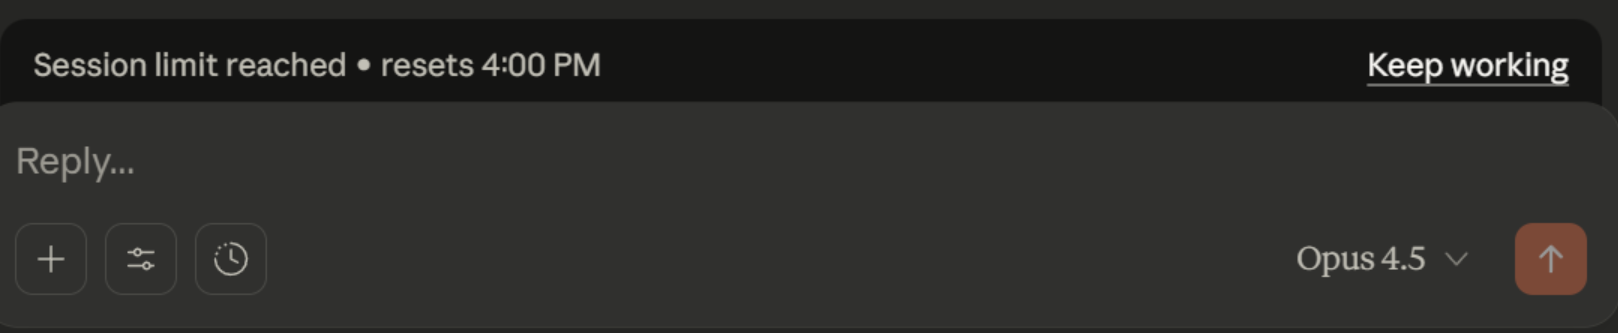
And when I go to test it it wasn’t even working 😂 The limits are a bother. It is starting to feel like it’s only worth using the free ones to make a roadmap and then find yourself your answers online.
AI generated Roadmap
Speaking of which, Sonnet 4.5 did give me a good roadmap yesterday. I moved step 5 above 3 and 4 thought because I want the feel to be right before the look.
Implementation Roadmap:
Step 1: Basic Spring Physics System ⭐ START HERE
- Create a simple spring class that can bounce and dampen
- Create an array of springs in a horizontal line
- Visualize them with Debug.DrawLine or Gizmos
- Add a test button to “poke” a spring and watch the wave propagate
Goal: See springs bouncing and transferring energy to neighbors
Step 2: Mesh Generation from Springs
- Generate a simple quad mesh at runtime
- Position top vertices based on spring heights Keep bottom vertices fixed
Goal: See a wobbly rectangle when springs are disturbed
Step 3: Basic Shader (Single Color)
- Create a simple unlit shader that just colors the mesh
- Apply it to the mesh
Goal: Colored wobbly mesh instead of white/pink error
Step 4: Shader with Offset Layers
- Add UV offsetting to create the depth effect
- Add the bright highlight line at top
- Add darker body below
Goal: Liquid that looks like AdamCYounis’s with layered colors
Step 5: Particle/Object Interaction
- Detect when objects touch the surface
- Add velocity to the nearest spring
Goal: Dropping objects creates ripples
Step 6: Container Masking
- Use Sprite Mask to clip liquid to container shape
Goal: Liquid appears only inside container bounds
Step 7: Multiple Layers
- Duplicate the system for second liquid layer
- Stack them vertically
- Different colors per layer
Goal: Two distinct liquid layers with separate surfaces
Step 8: Tilting Support
- Keep meshes horizontal while container rotates
- Adjust visible portions based on tilt
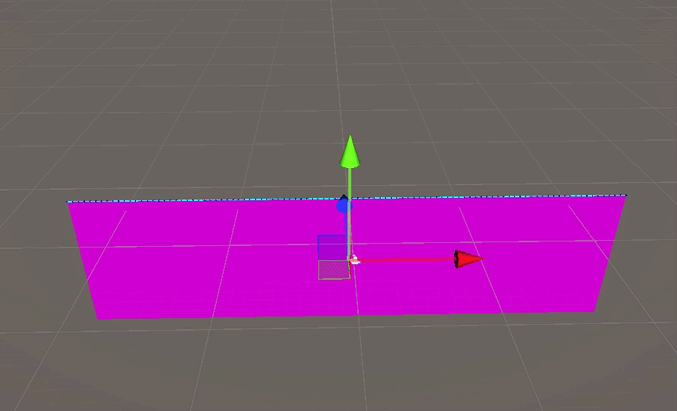
Goal: Liquid stays level when container tilts
I like this roadmap, however I’d need to include displacement in the layers when tools and particles interact with them, as well as registering the ingredients as in the container when they are in it. That was what the updated code was meant to do.
Adjusting the object interactions
HOLD UP!
I forgot to add one of the new scripts to the cube object. And woah, it kinda works!
I’ll take some time to fix the draggable object code because it was behaving really oddly with all these extra drag params.

Much neater now. I also discovered that I need a z distance form the object to the camera with a perspective cam, I just used the objects initial z position with the ortho cam on the jug scene. I really want to do more composable code rather than a giant file that does everything.
Now to fix the non breaking when it’s beneath the surface - turns out I just needed to add a continue if the depth was past the max strech input. With a few settings updates I get this:
Pretty nice so far! I noticed a few things though: it behaves like a sticky or springy syrup when you lift an object out of the liquid, and if you lift it within the stretch limit the spring comes down to meet the object. A few changes were needed - the code was always checking if it should push down first but didn’t check if the object was coming from above or below. This is done by checking if the velocity is above 0 or below 0.
I also wanted to add velocity based stretching of the surface - if its slower, stretch less and “break” earlier, if its faster, stretch farther and break later. With a bit more tweaking I got this:
I’m pretty happy with this! Time to move on to the next thing:
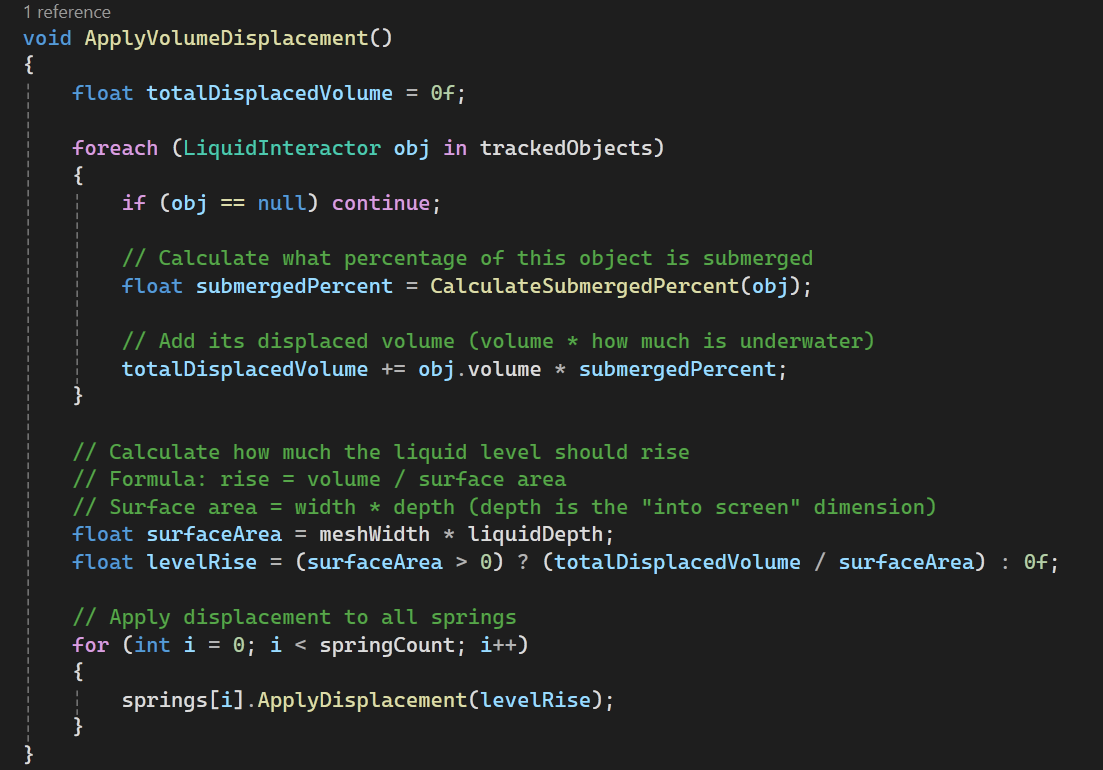
Volume Displacement
With this, I want the springs to move upwards if there is a particle inside it that has volume. The springs need to have an “original” base line “current” base line. The original will be based off the volume of the liquid - the “true” height of the volume in a container. The “current” base line is the height when you place a large item in it, displacing the water. It will always be higher, because the original will should go down if you remove liquid.
There’s a new method that applies the displacement:
And one to calculate how far submerged something is:
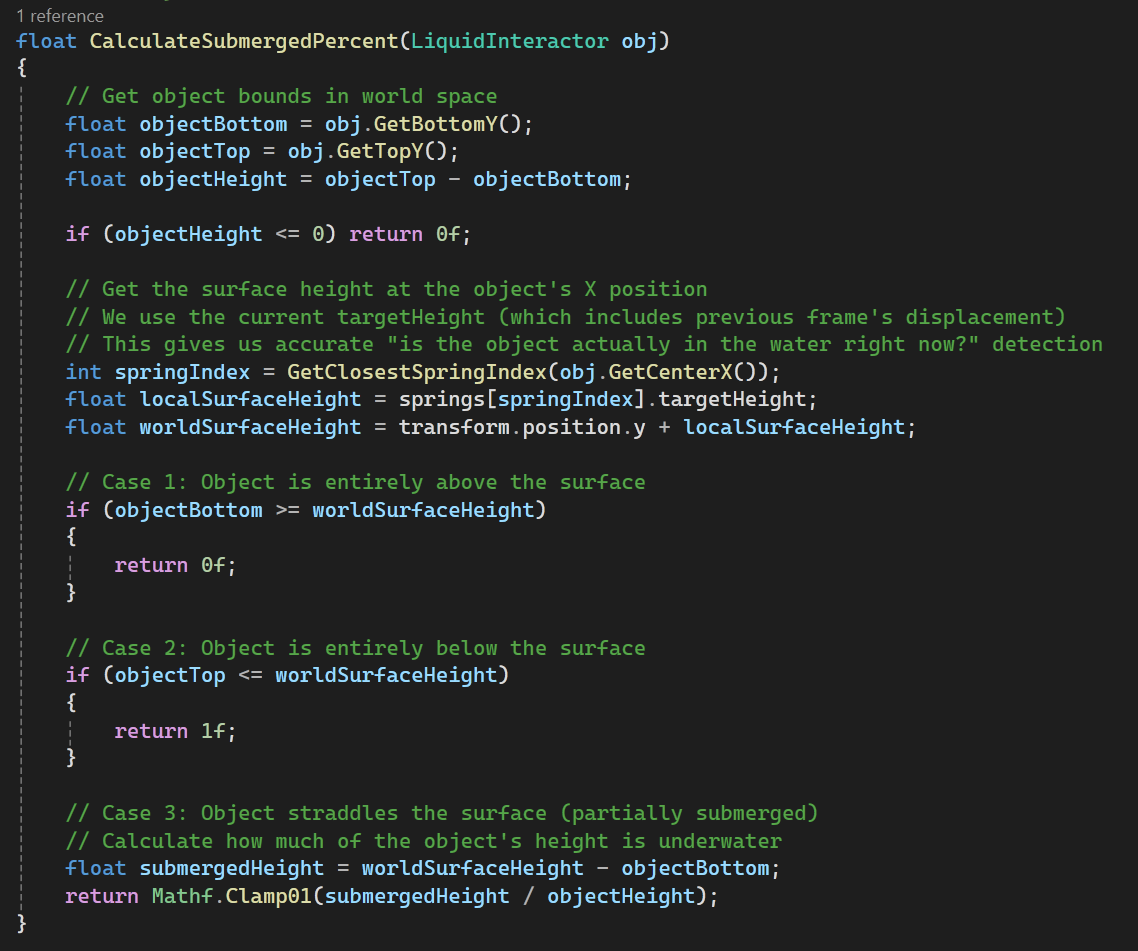
And that gives us this:
It’s so satisfying to watch it go up and down and ripple! It’s a lot of small parts put together that end up feeling good.
Container linking
The next part of this is to hook it up to a Container. Its a bit late now, and I have had a few passes at it from Opus - this is where I am: sooo close!
I’m a bit tired to write up what it’s doing but I will do a bit of it tomorrow for my own understanding.