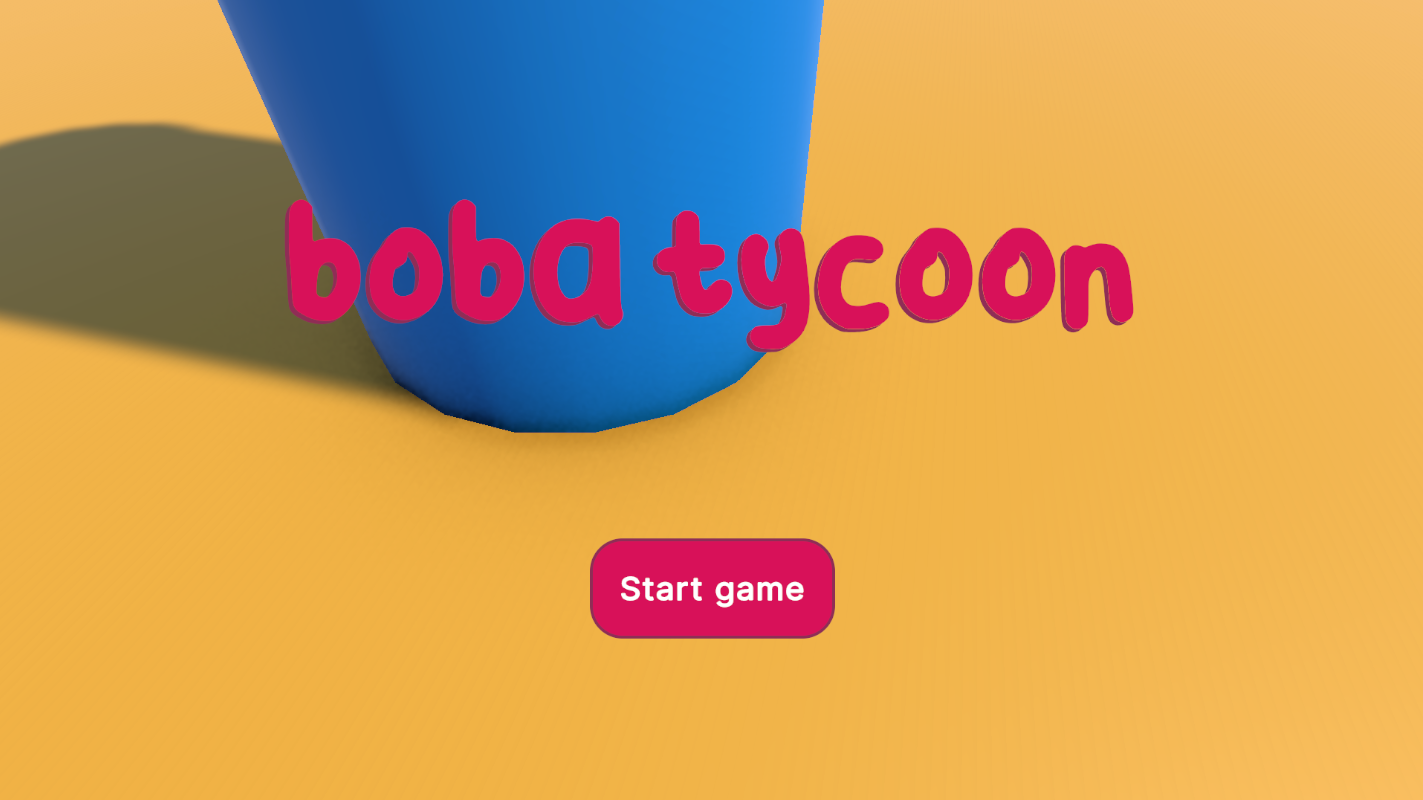
Ultimate Indie - Week 2 day 3 Prototyping Boba Tycoon continued
Back to work! Today I am really going to focus on the custom slider. I think after the slider I may set up my planning tool. As a side note I’m enjoying being able to write about the process while I work on it, a day job is always hush hush so you don’t share company secrets.
Fixing the slider
I’ll grab my steps from yesterday so I can have them handy:
- First I need to constrain the cursor to the space of the VisualElement
- And then I need to change a value with the moving up and down of the cursor
- And then I tie an element to move with it
- and the finally, I hide the cursor on holding the pointer down
Constraining the cursor
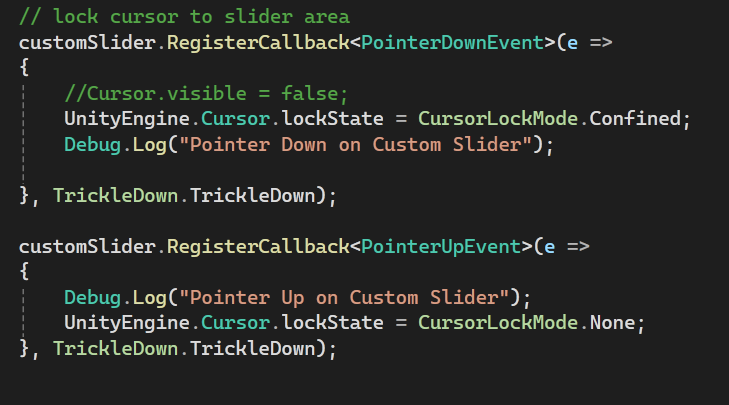
Where I got yesterday was being able to constrain the cursor to the window when I held the mouse button down:
 The cursor stays in the window or it gets the hose again
It was pretty simple but the caveat for now is the same on the slider in that the PointerUpEvent doesn’t fire if let go when off the item you first clicked. I have less of a problem here because there is no unpredictable area where it will work, it should just be the entire thing.
 Basically built in
The cursor will be hidden later, for now I need to see it to know it’s doing what I want it to. The second part of this is to make a rectangle of the area I need it to stay inside. I’m not sure how tricky this will be because it needs to get the position and dimensions of a UI Toolkit element. I think I need something with ScreenSpaceToWorldPoint or WorldPointToScreenSpace.
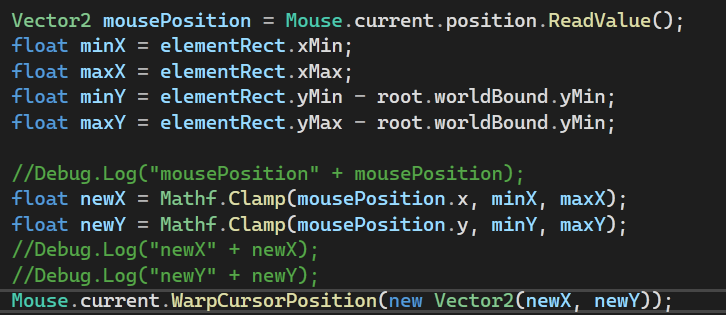
A quick google gave me a simple answer:

 Easier than I though
This means I can just clamp the mouse position to this rectangle, which means the PointerUpEvent should always fire once you let go. With the new Input System, you need to use Mouse.current.WarpCursorPosition(new Vector2(x, y)); to move the mouse.
…Except it’s not that simple! The Y value is off - the Debug.Log I have here is the bottom left corner of the element:

So it’s pushing the mouse in an offset bound:
A bit of research tells me that the Mouse position and the worldbound on an element are calculated differently.
 Thanks Gemini
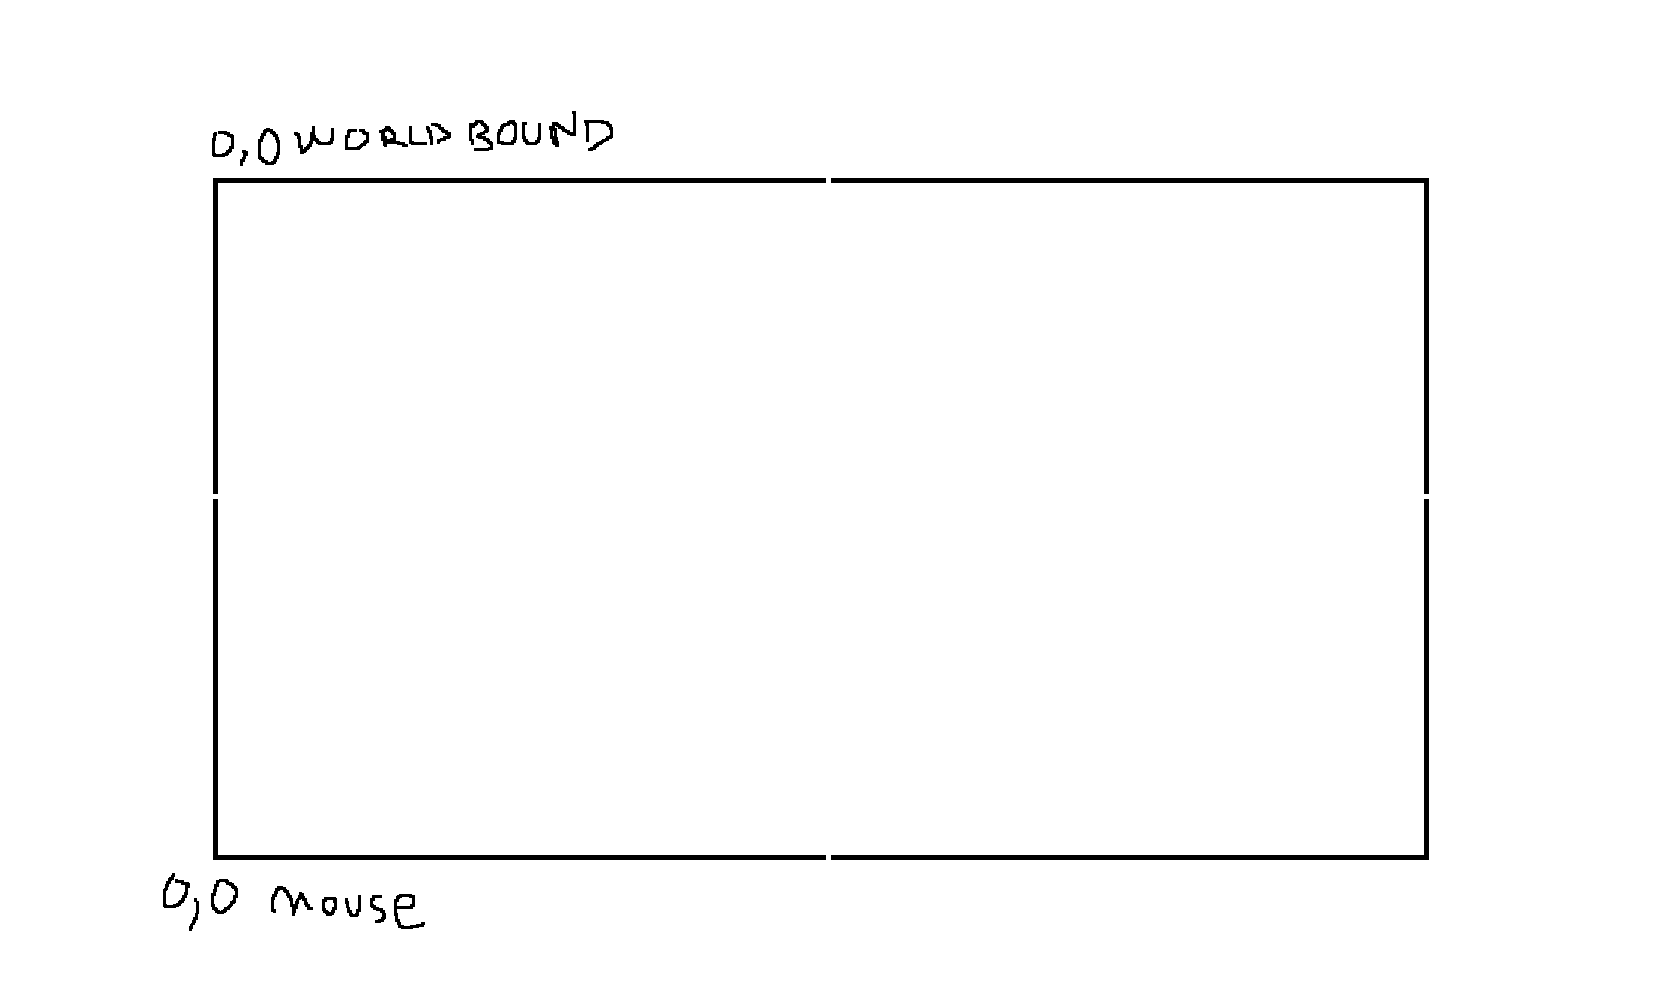
Now that I know there is a difference I can work towards making it line up. As a diagram this is what I understand:
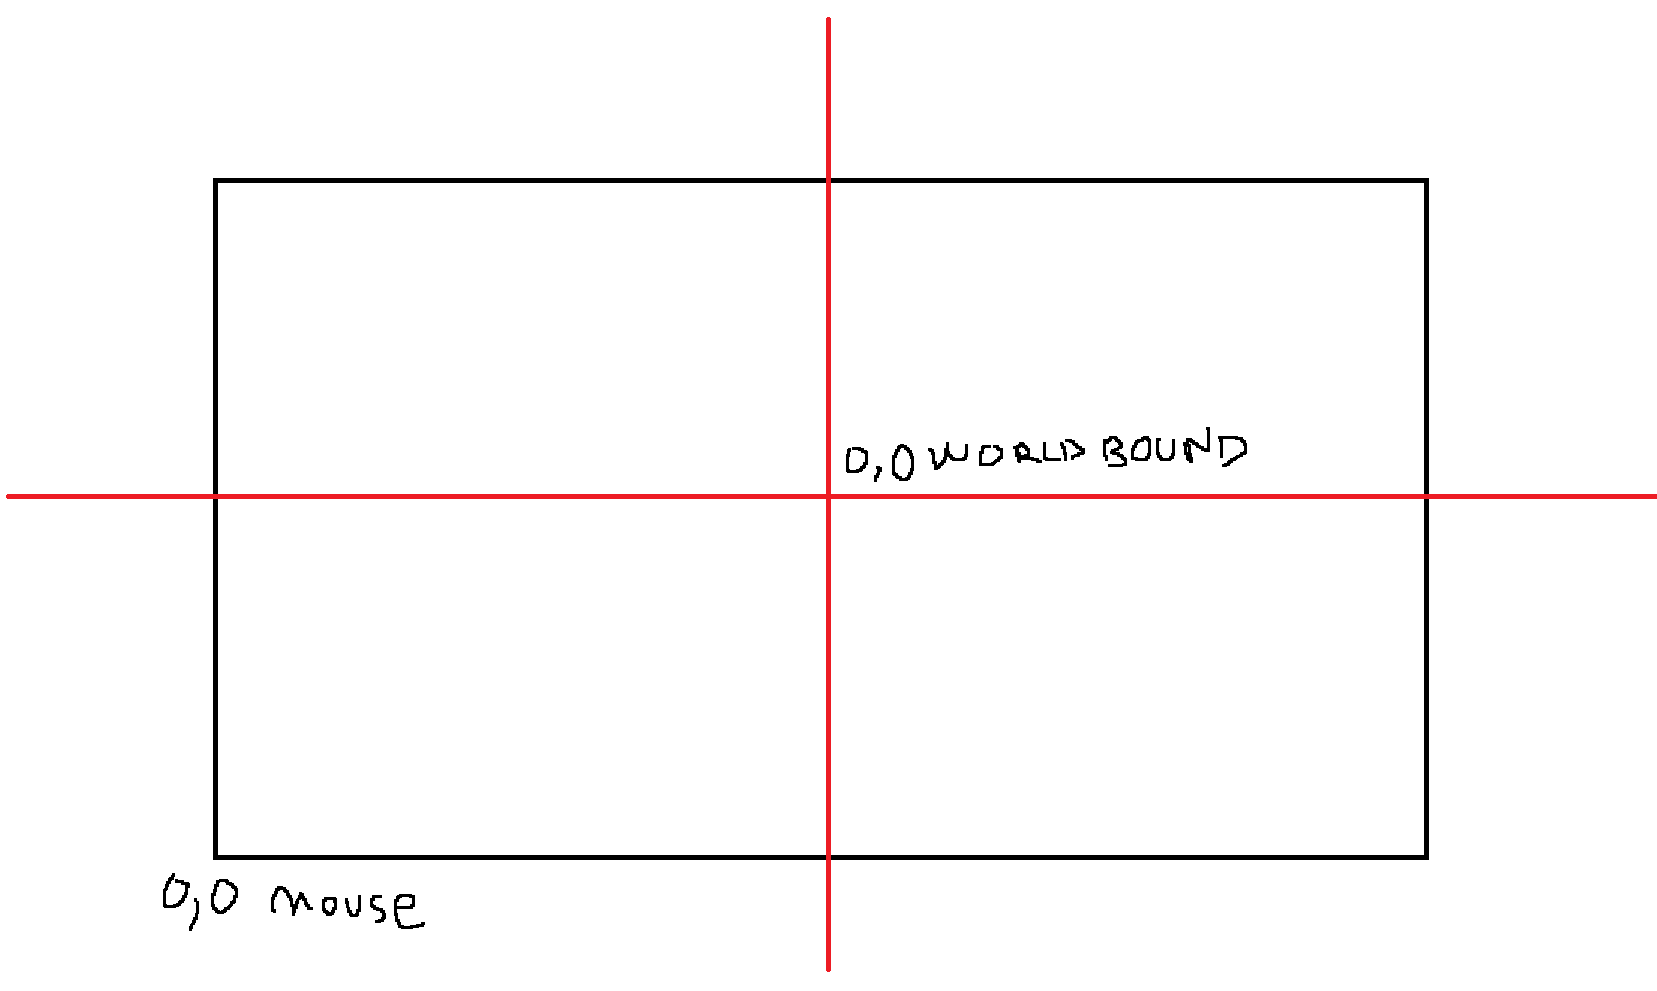 Let’s pretend that the cross is dead centre
I had a small google more and saw conflicting information so I asked Copilot inside Visual Studio and this is what it gave me:
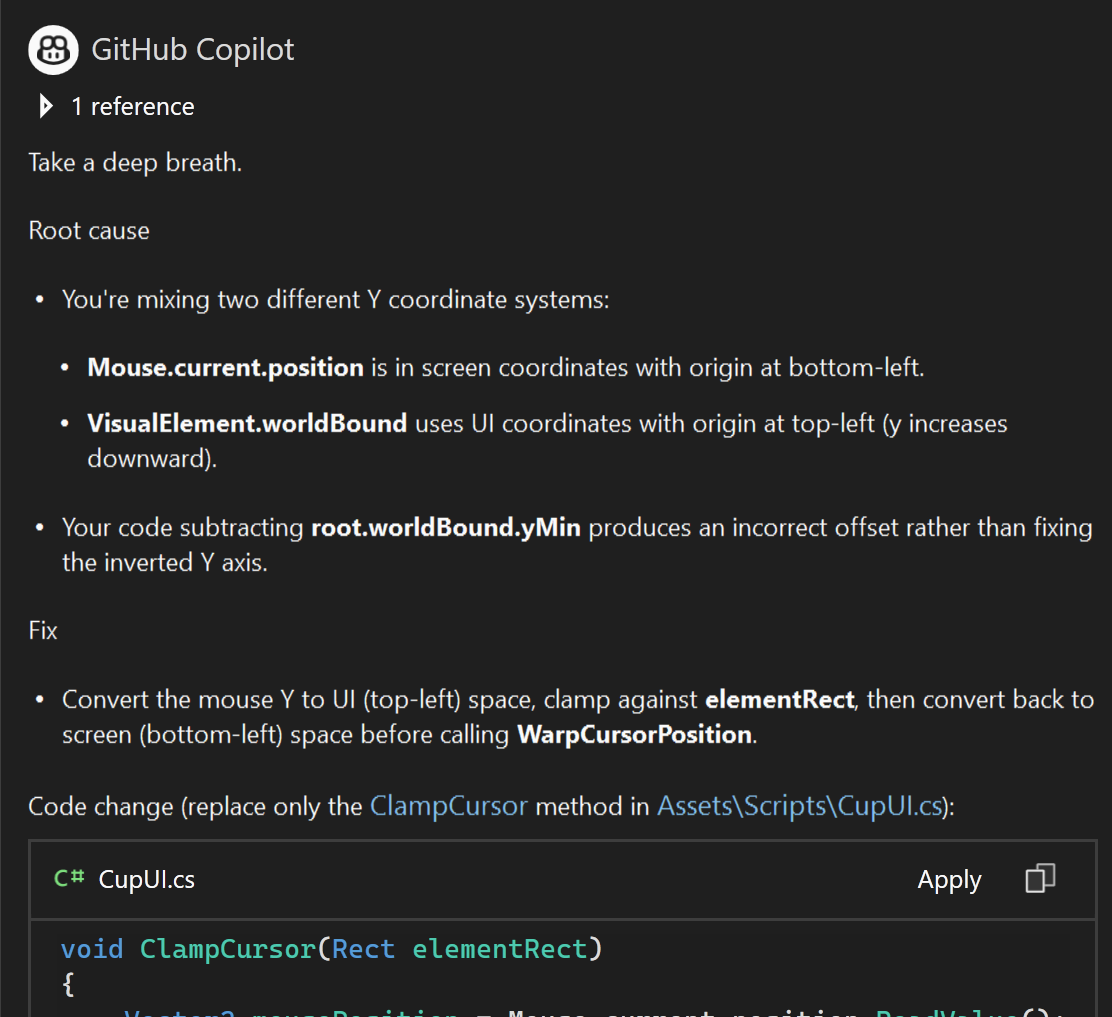 This is not the same!!!!!!
This one is telling me worldbound is top left instead of dead center. This makes more sense to me because the x axis is fine. So it actually looks more like this:
 The calculation only needs to invert the y coord
Since Copilot gave me the code I put it in and tested it:
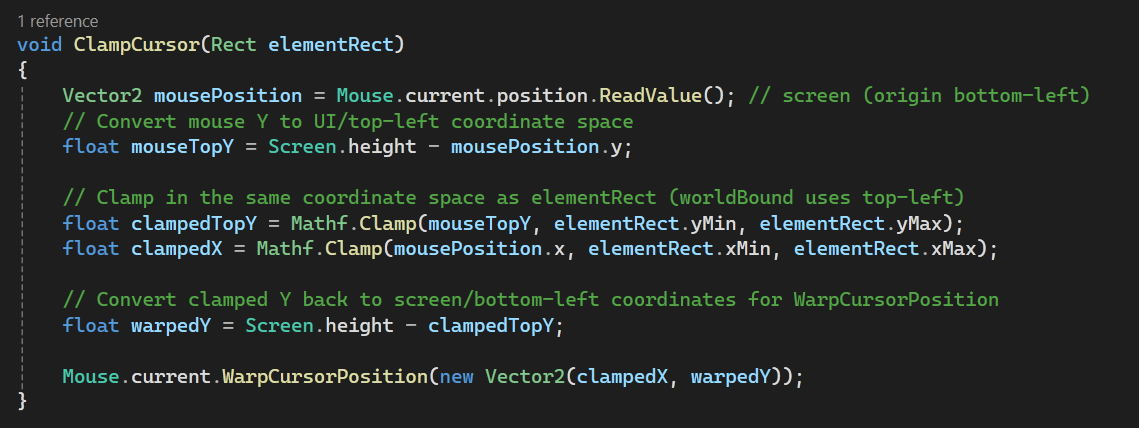
 Good bot
It’s a bit hard to tell in the gif but I’m moving my mouse way further past where it should go but it’s being pulled back into the area.
Looking back at what Gemini gave me it actually says it comes from center.y OR min.y OR max.y which I now realise is not actually accurate or useful. Bad bot.
For now it’s pretty close to what I want! There is a slight problem now where if you let go in the frame that your mouse hasn’t been clamped and it is outside the box it will not fire the PointerUpEvent. This problem comes back again. At this point, why not ask Copilot again:
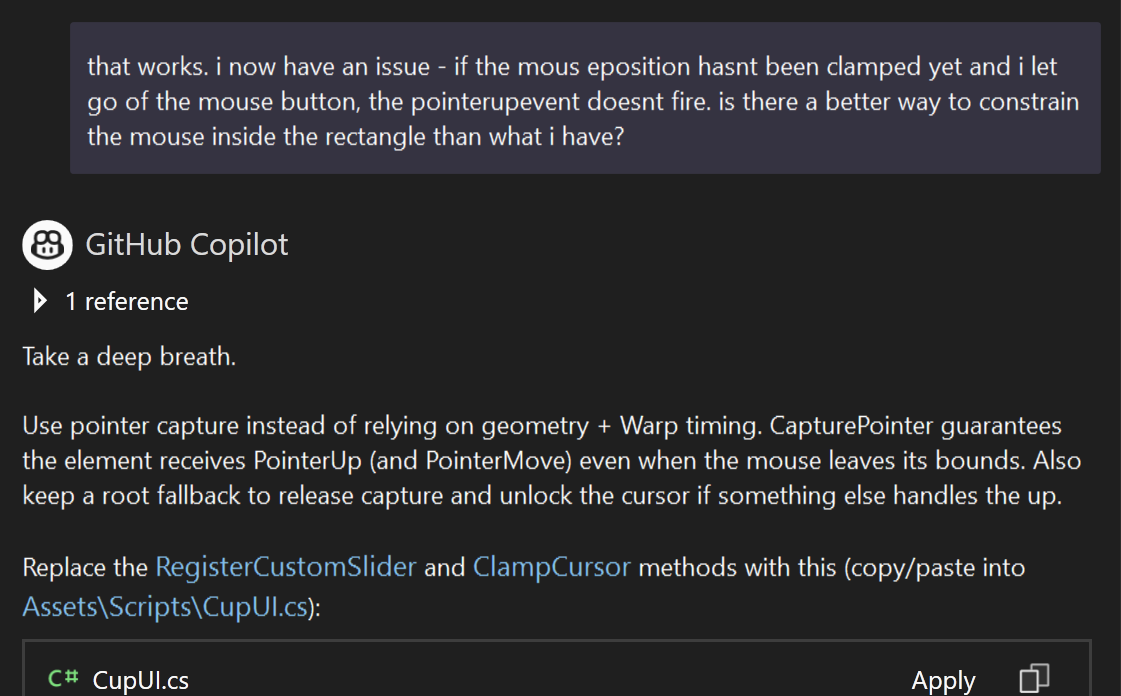 I don’t know why it keeps telling me to take a deep breath
Ahh that’s a good thing to know about (so long as Copilot isn’t hallucinating)! It’s good to save your work and commit it to your repo before you do this in case it messes upi work working version. And it’s also good to read about what it’s explaining in the docs.
When you handle pointer input, you might want the control to capture a pointer. When a visual element captures a pointer, Unity sends all the events associated with the pointer to the visual element regardless of whether the pointer hovers over the visual element. For example, if you create a control that receives drag events and captures the pointer, the control still receives drag events regardless of the pointer location.
From the Unity docs
It’s exactly what I want. I hit that apply button and test it:
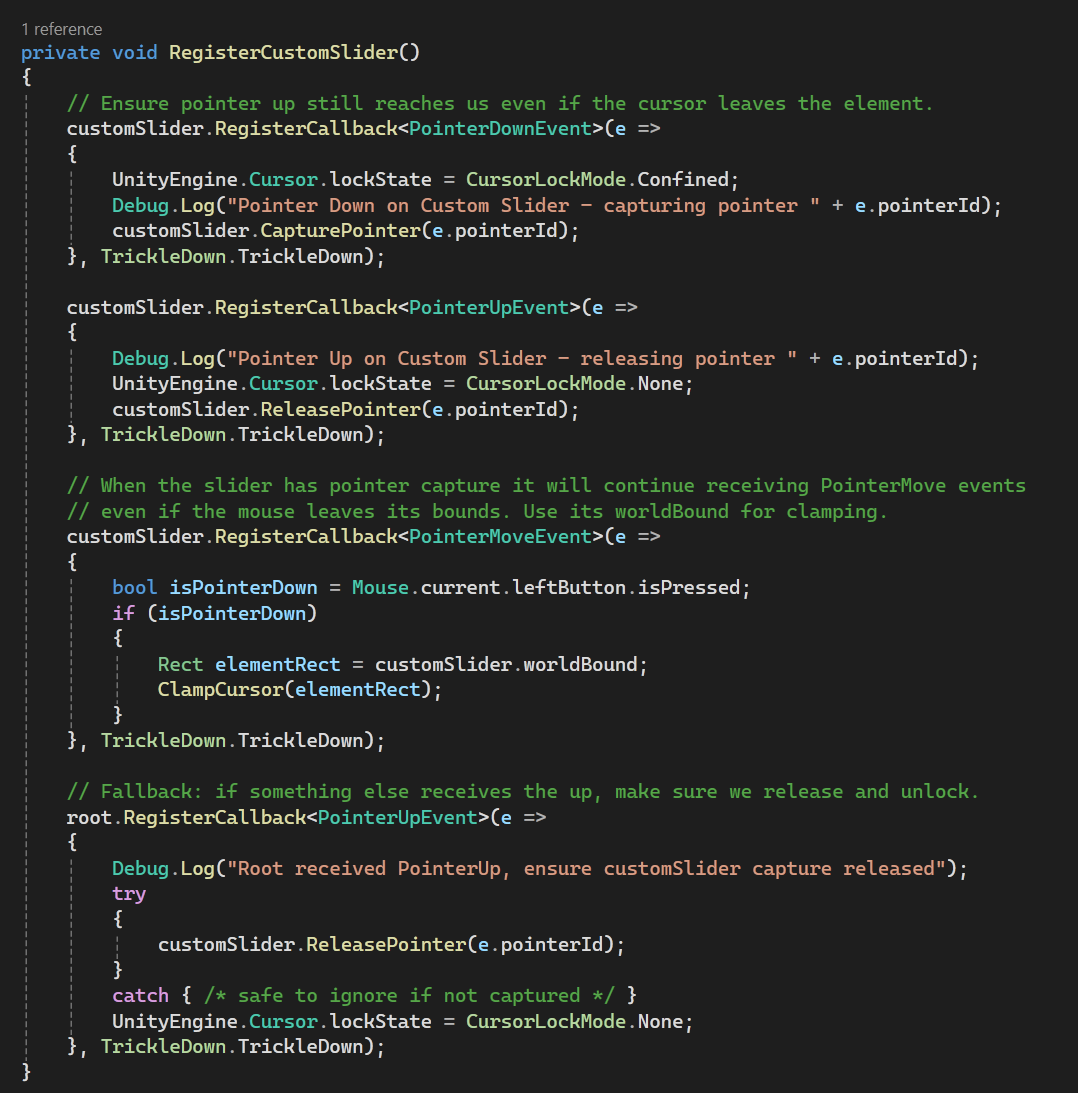 Am I a vibe coder yet
 The test
It’s now reliably releasing whenever I let go! Great, this is actually perfect for what I want. Now that I know about CapturePointer I wonder if I could put this on the original slider? I gave it a little try and it seemed still unreliable. My custom one is doing all I need.
At this point Copilot offered an “improvement” which ended up breaking the constraints so I threw those out. Bad bot. This was a chunky par, and probably the most complex. I’m ready to get the next step:
Changing a value based on the cursor position
In my last project in the web dev bootcamp I made a music app where you pressed keys on your regular keyboard and it would “record” the notes on a timeline. I had difficulty in this because it was taking the visual position of the timer bar to “record” but it couldn’t play it back reliably because the timeline tracker did not reliably land on the 1.236437284 second mark every time. My teacher, Joel, gave me the advice that I should be using the timeline tracker as a display of values, and recording the backend value based on that instead of visuals because of pixels. It worked perfectly after that!
So my takeaway is that the value is the important thing here, not how it looks. You use the visuals to display the real values. So always start with the values and Debug.Log them 😄 Seems obvious now but not to a newbie like back then!
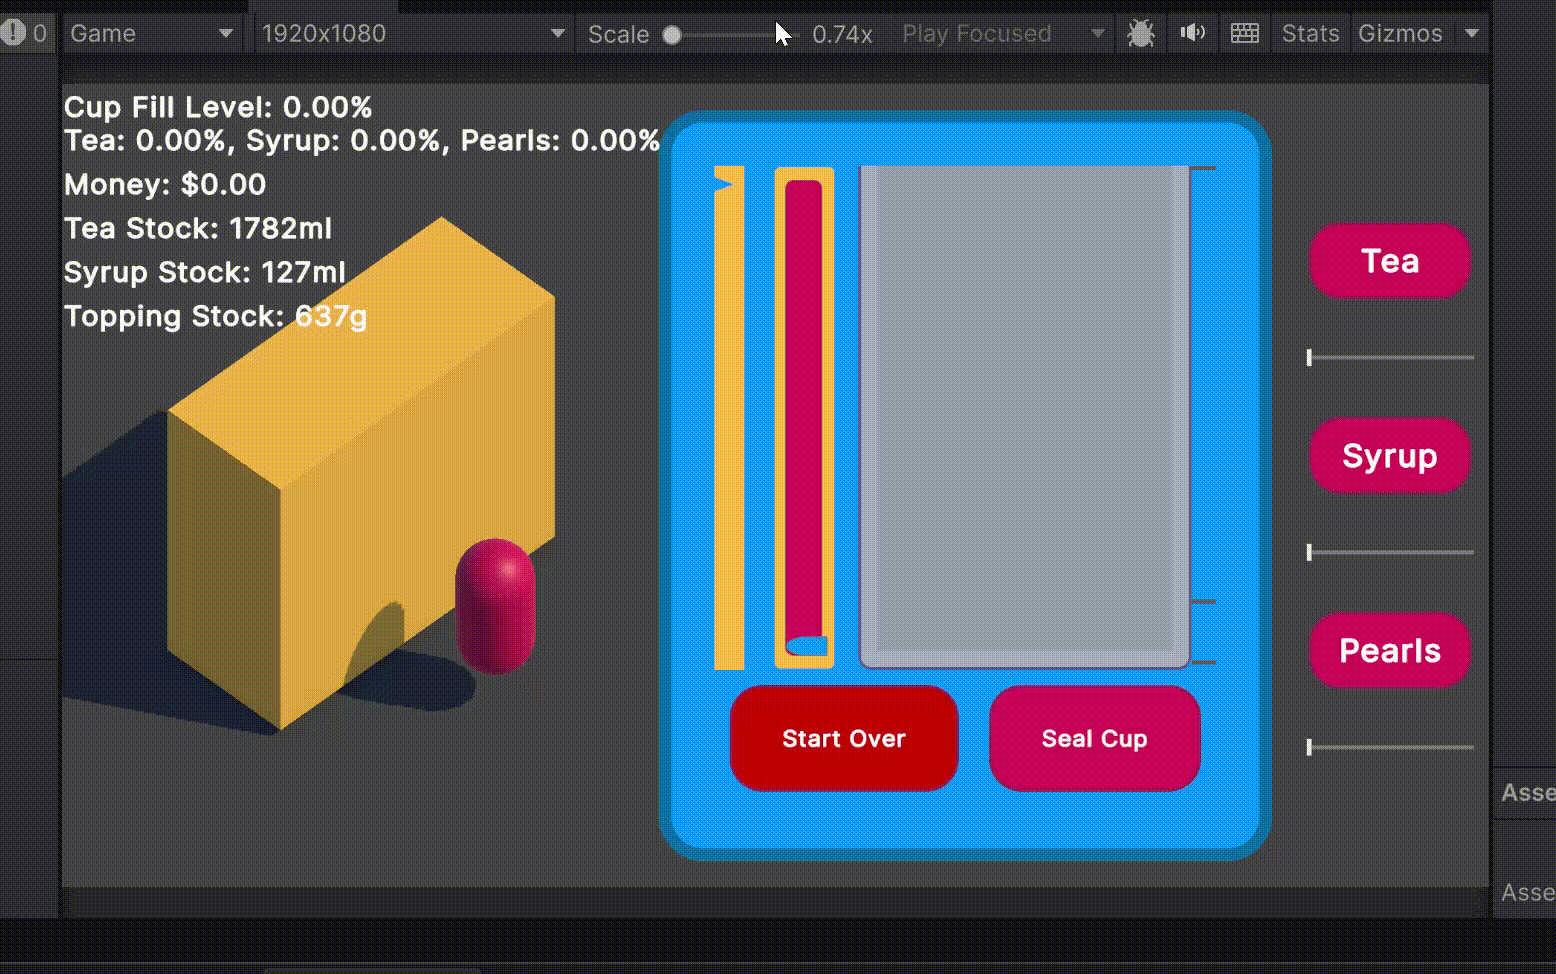
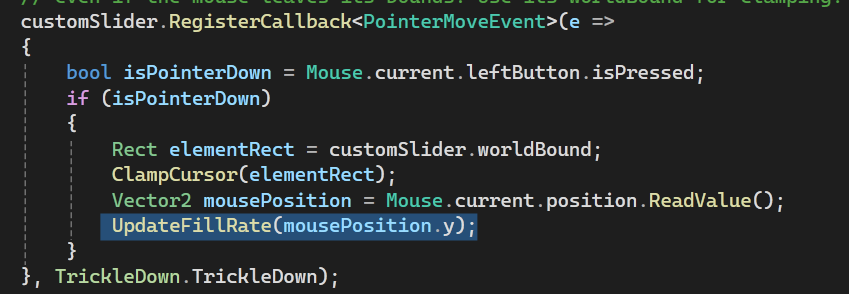
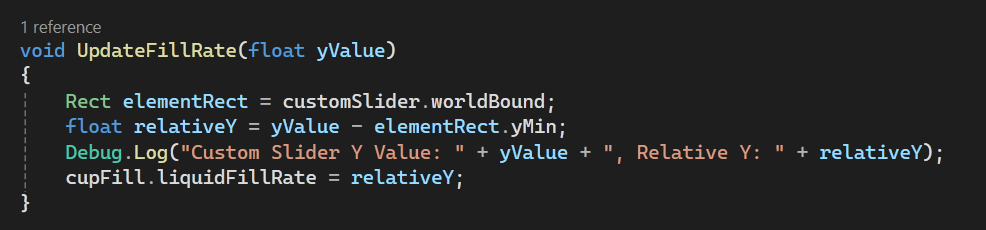
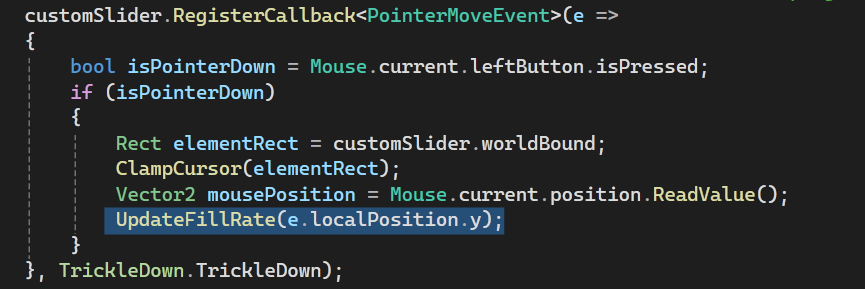
For my project: I need it to both display the fill rate of the chosen ingredient and set it. Displaying will be handled in the next step so this part is just setting the value when I move the cursor to the top of the area. First pass I throw in a new method right after the mouse is clamped that updates the fill rate based on relative positions:
 No idea if this will work
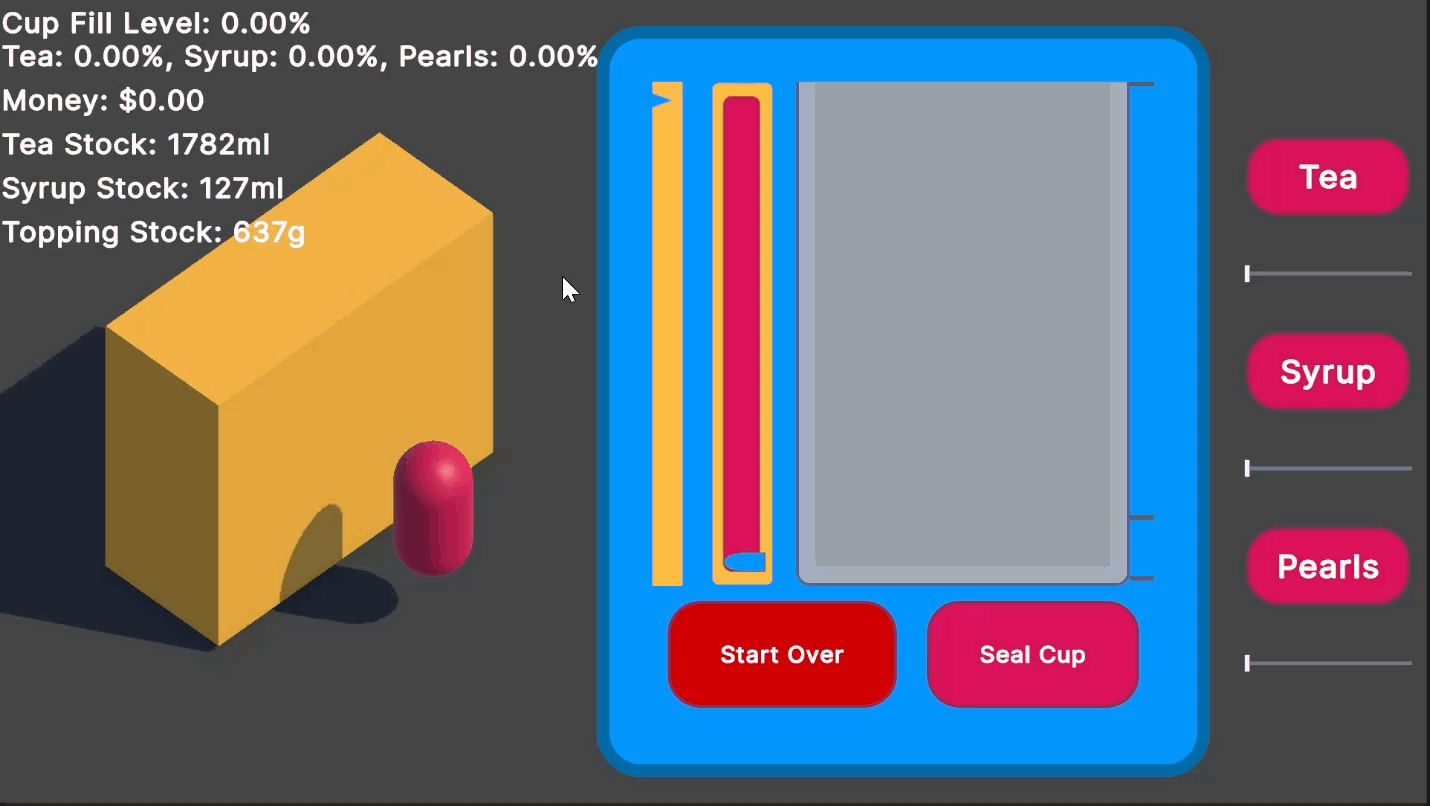
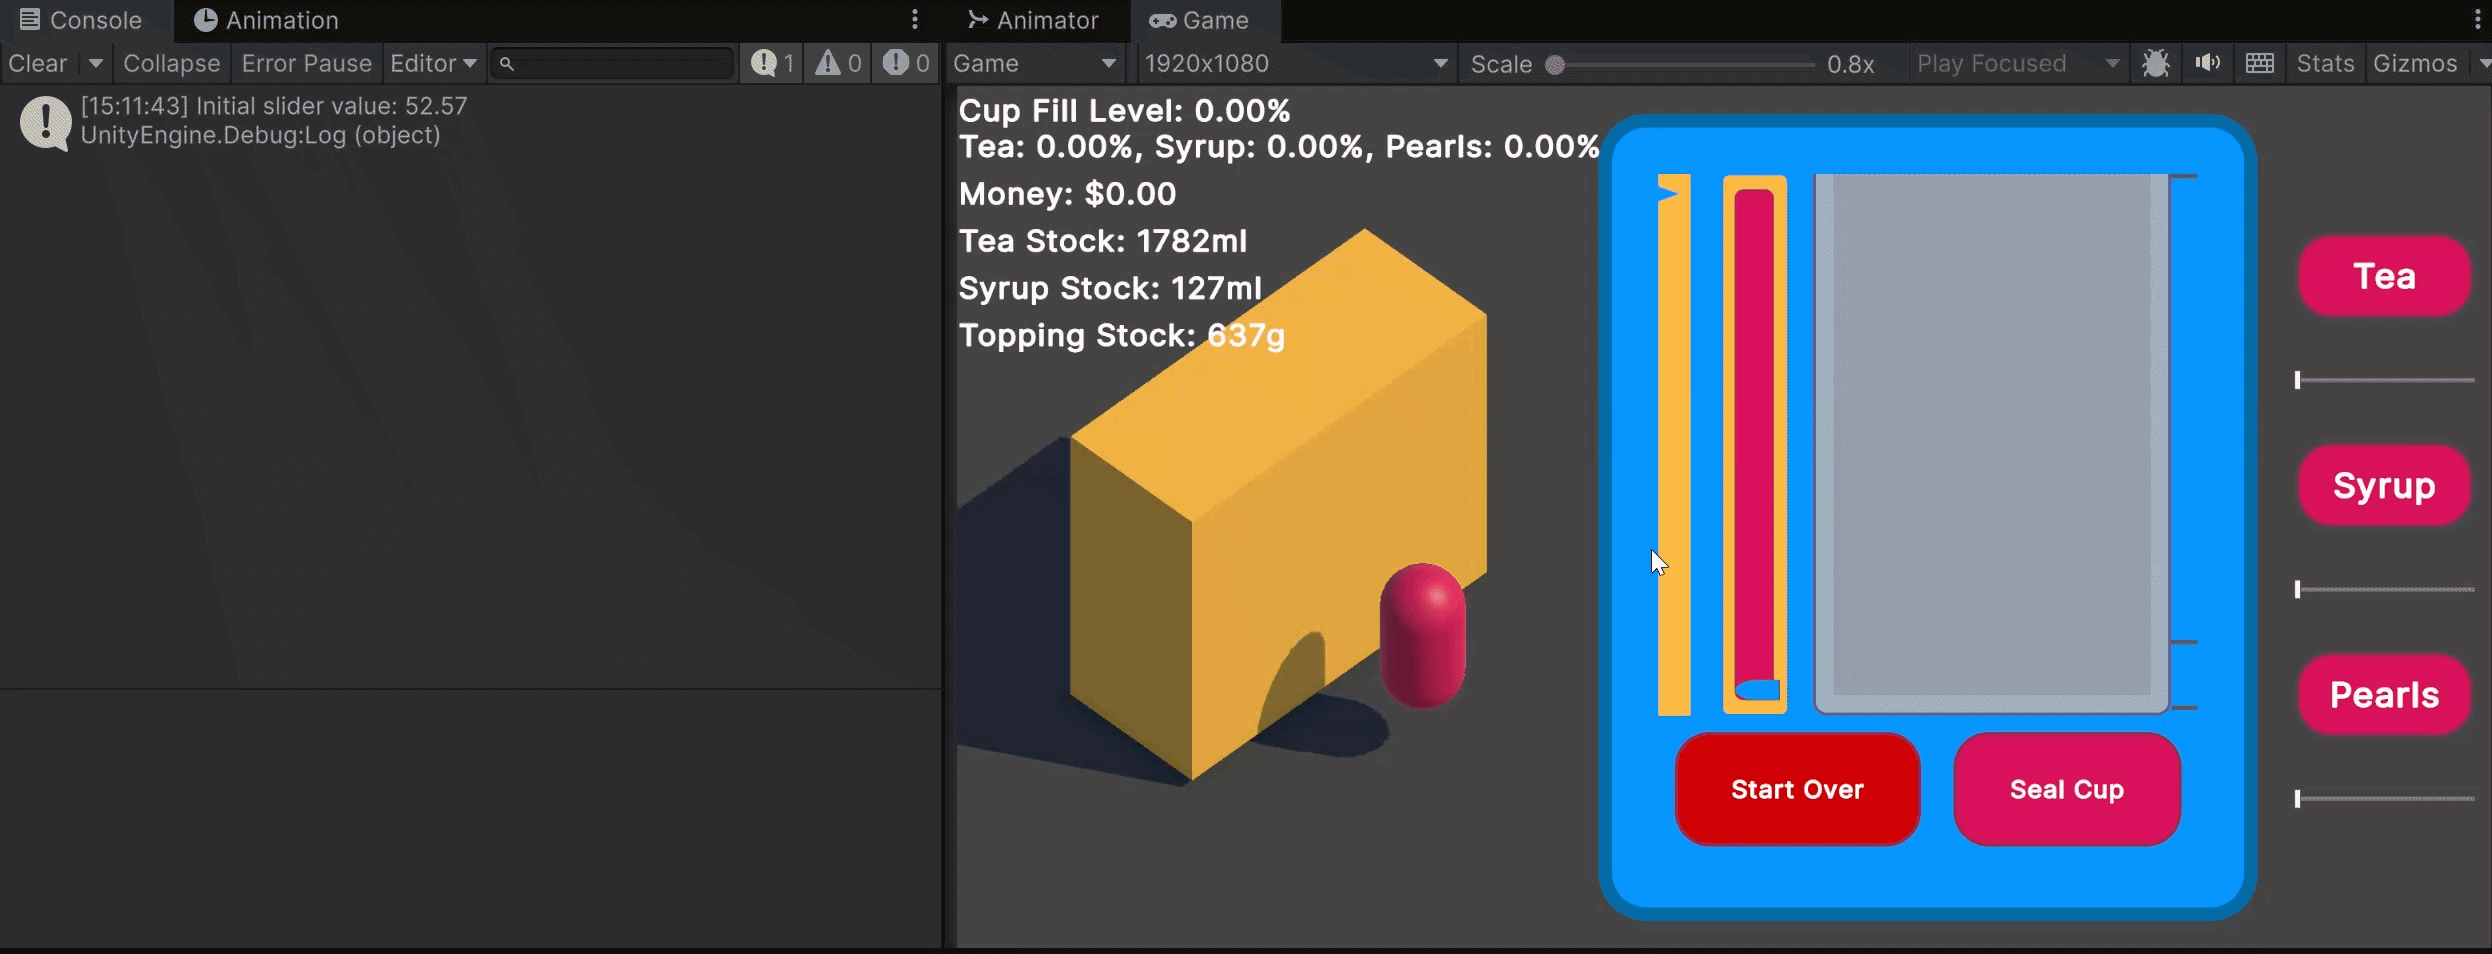
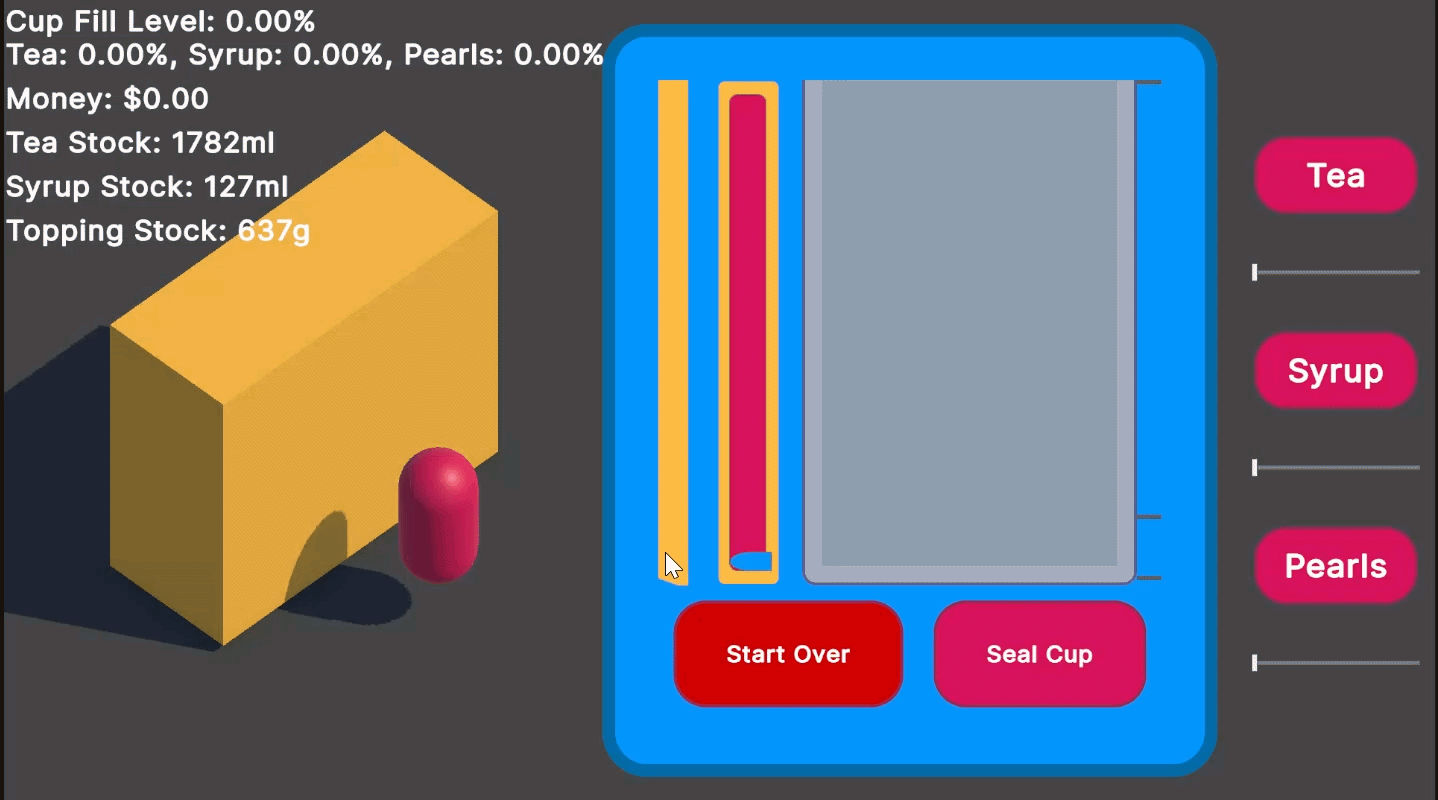 Off by a little but it works
Eyyy it’s working! It looks like it has the same offset problem I had earlier. It is also moving the other sliders because those are still bound to the tea fill rate. Got it’s kinda jittery though. That can be a later fix. I know I have the other slider’s Max values at 1000 to I need to map it to be the same on this one. I need to make the value go to 1000 at the top and 0 at the bottom.
It took me a bit of messing around with numbers but I finally got it lined up with a bit of math help from Mike 😅 I also needed to use the local position of the mouse instead of the Mouse position from the input - this way I can just use the height and make the number a percent of 1000 so the height can be anything.
 Mathematical!
 The jittering even stopped so I don’t have to worry about it
I was tempted to ask Copilot again, but I wanted to understand what I put in so I decided to let me brain cook a little and I do know what this code means. Looking good, now for the next part:
Moving the arrow element with the value
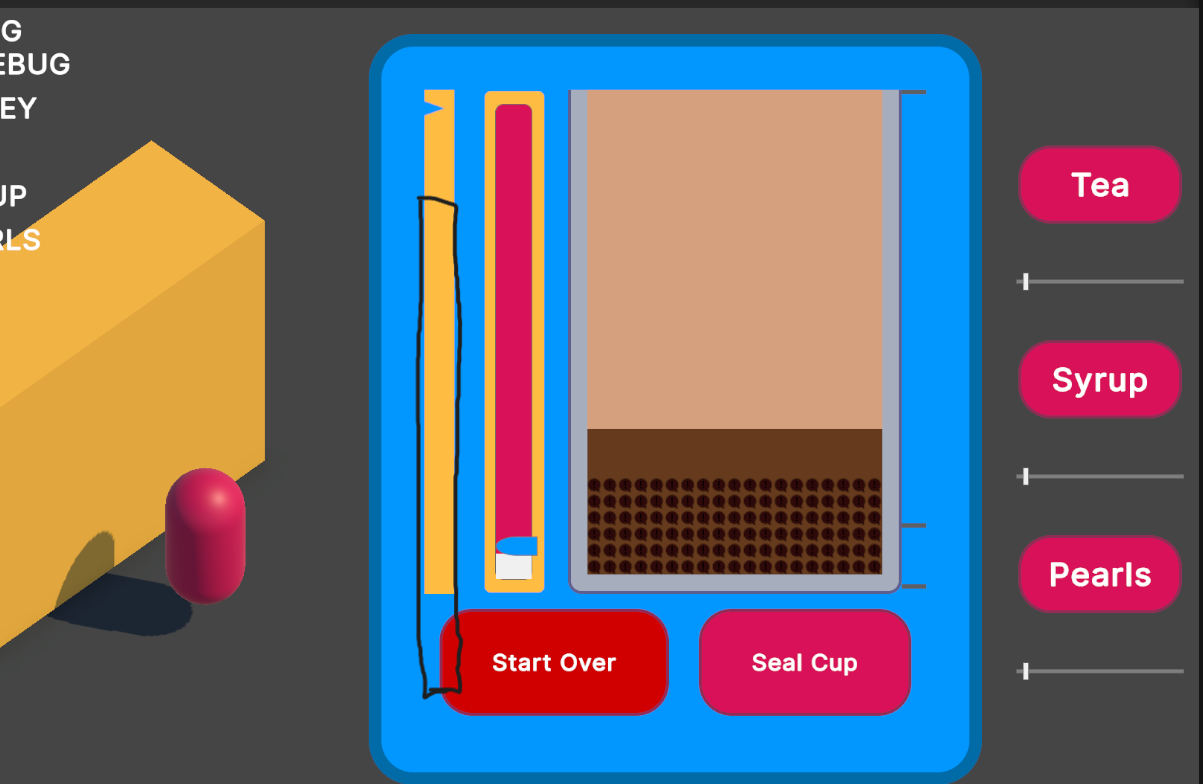
This involves moving an element up and down based on the height of the whole element’s height. I think I want horizontal bars soon but this vertical one is good for now. I mostly want to be able to set isFilling = false when letting go of the slider and the built ins don’t do that as far as I could tell.
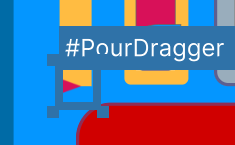
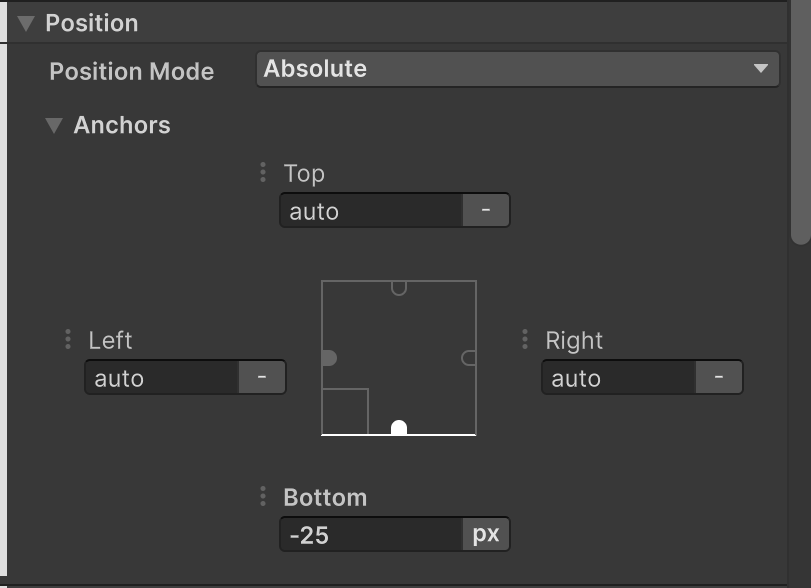
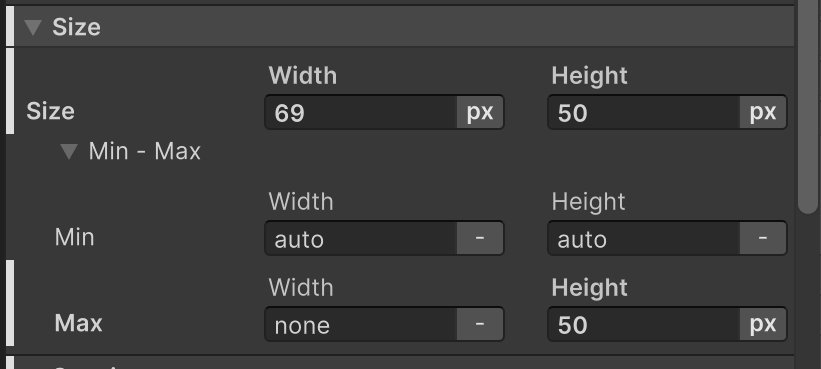
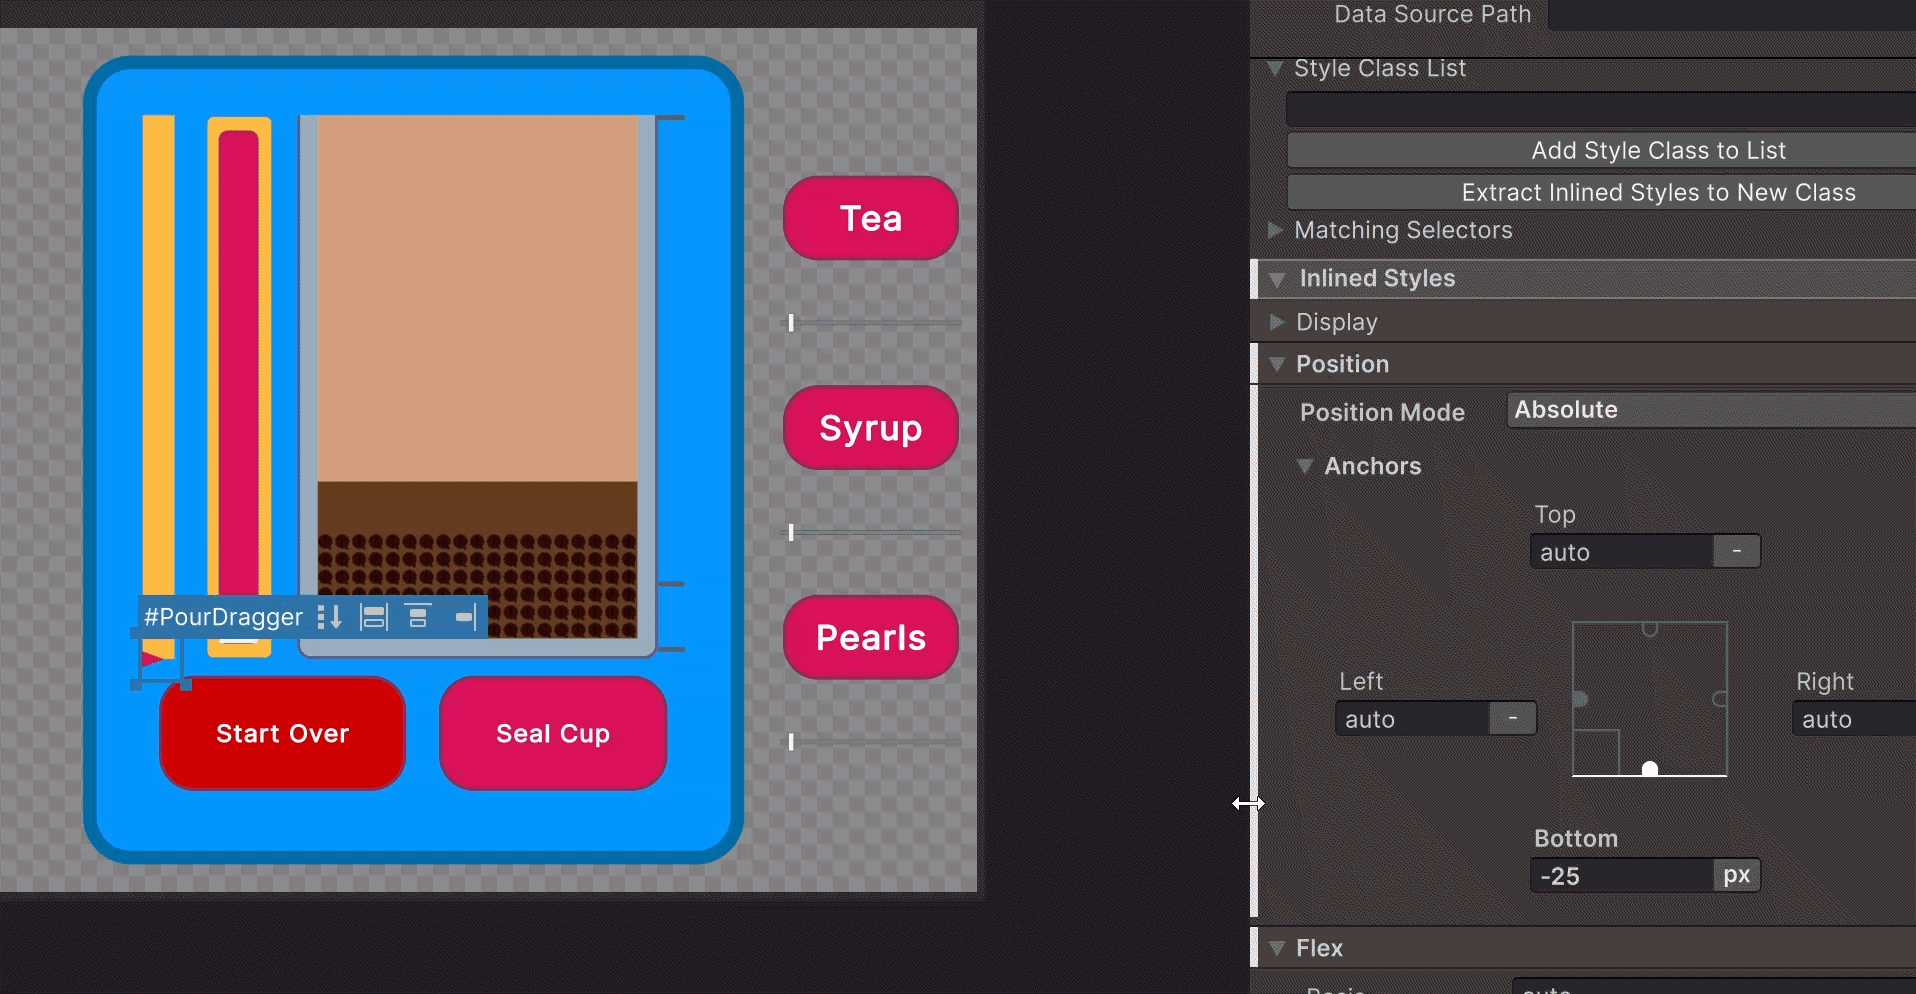
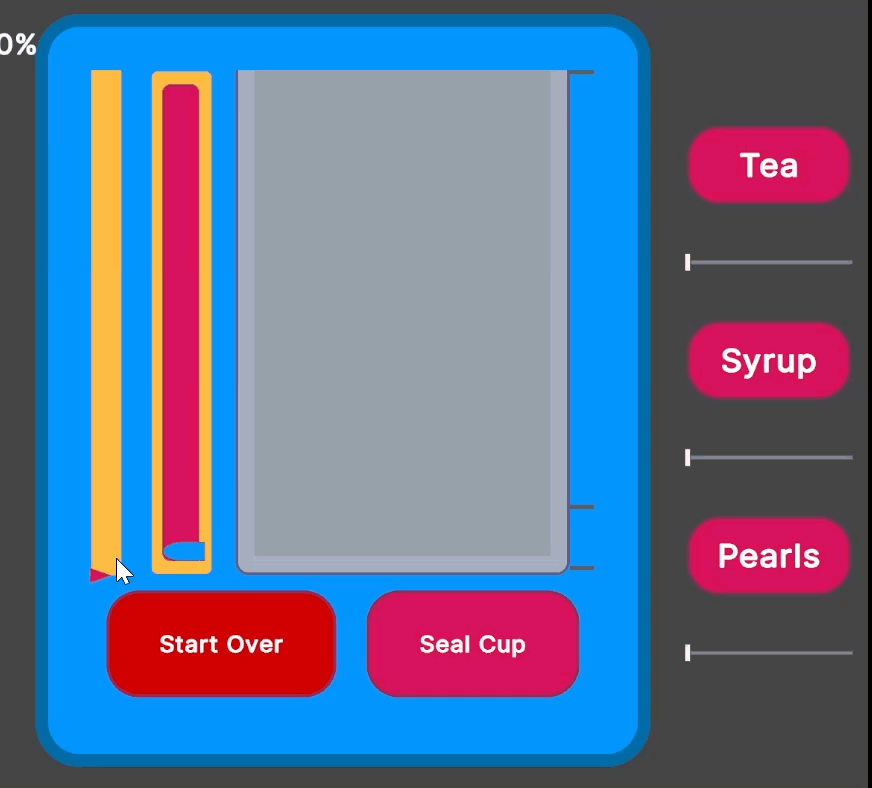
Right now I have a simple VisualElement that has a Right Arrow sprite as the background. I set position Absolute and bottom -25px so it can be at it’s lowest value to start. I’s -25px because the height is 50px, and I want the arrow point to be lined up with the value of the fill rate.
The bottom property just needs to change, since I manually change it if I do I in game it should do what I want:
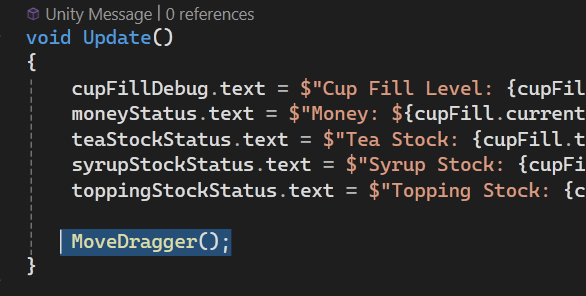
And then adding a new method to update the style.bottom. It has to be called in Update() for now otherwise it wont change if the value is changed from something else. This is important if I want it to decay after the mouse button is released.

And the result:
That was easier than I thought! Let’s hope this doesn’t fall apart when I build it in a smaller resolution for web.
Hiding the cursor
Lucky last is simple. All I need is to change Cursor.visible in the PointerUpEvent and PointerDownEvent.
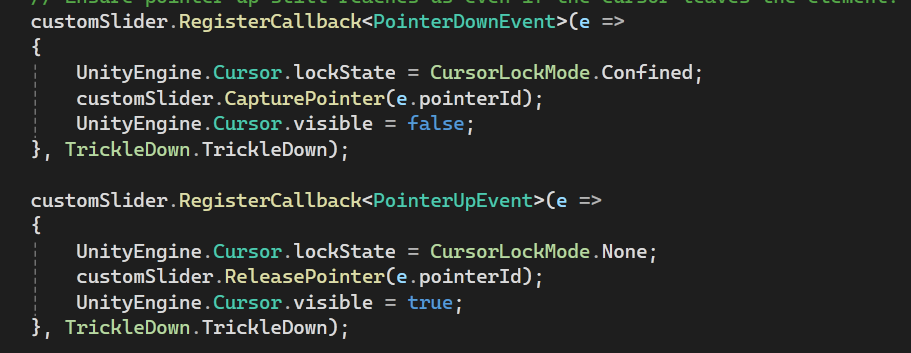
Here is is working as I wanted:
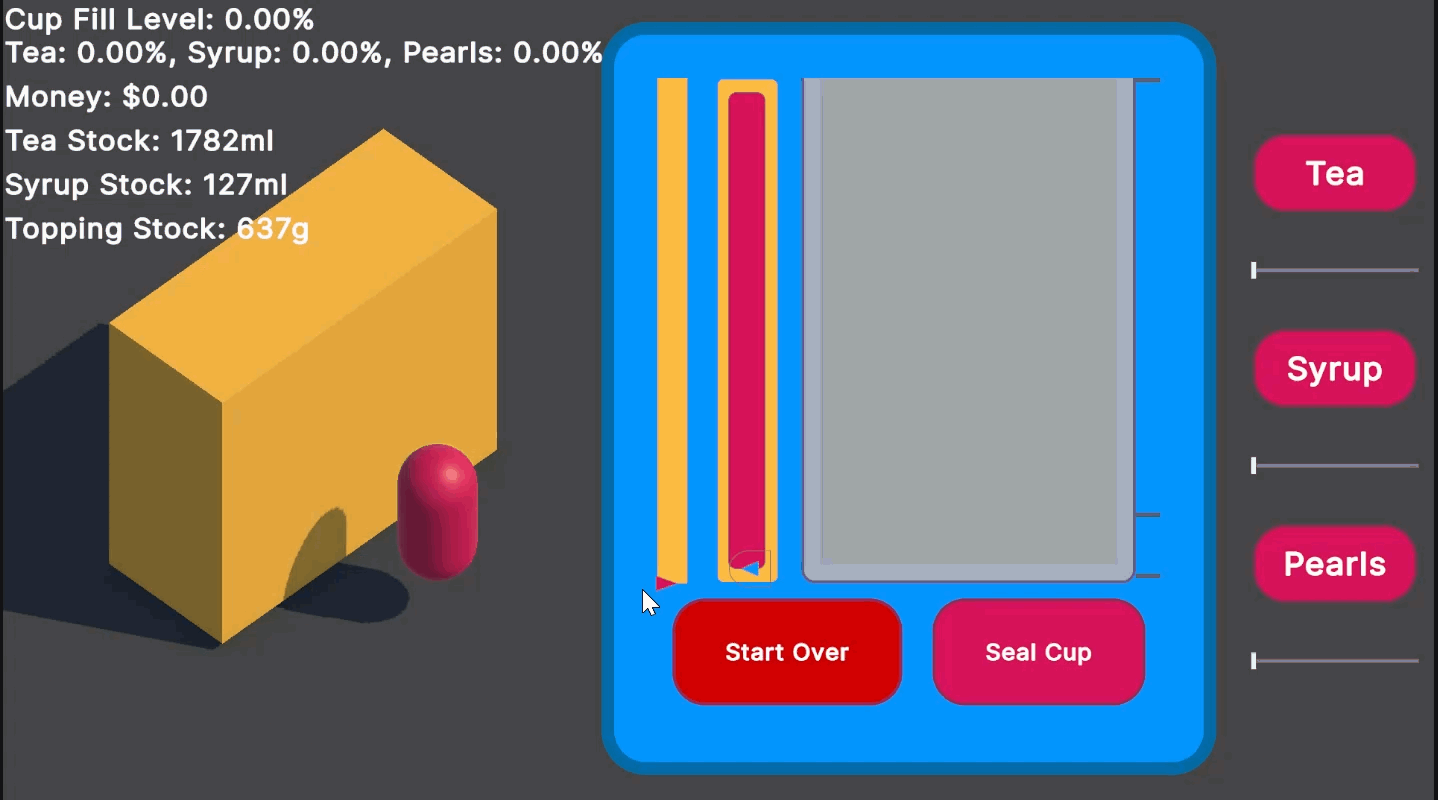
I’m really happy with this! I will add a fill thing like the other slider but for now this is pretty much what I wanted. I like how the cursor disappears and shows up were you expect it - next to the arrow point. I also tried to use the arrow sprite on the built in slider to see if I could line it up with the point and it seems like there’s a strange offset. I’m glad I have this custom one though because I know how it all works.
What’s next?
I think I should turn this into a custom UI Element so I can just drop them in to UI Docs, and maybe I can make it horizontal too. Not sure how soon I will need it but it’s all a lot of learning!
After that?
In hindsight, the “doable” list I had yesterday was too long 😂 I meandered a lot too so I didn’t get a focused list done. Maybe my brain knew that the top item on the list wasn’t just one thing. Today I locked tf in though, I wanted this done and working the way I wanted.
Project Management
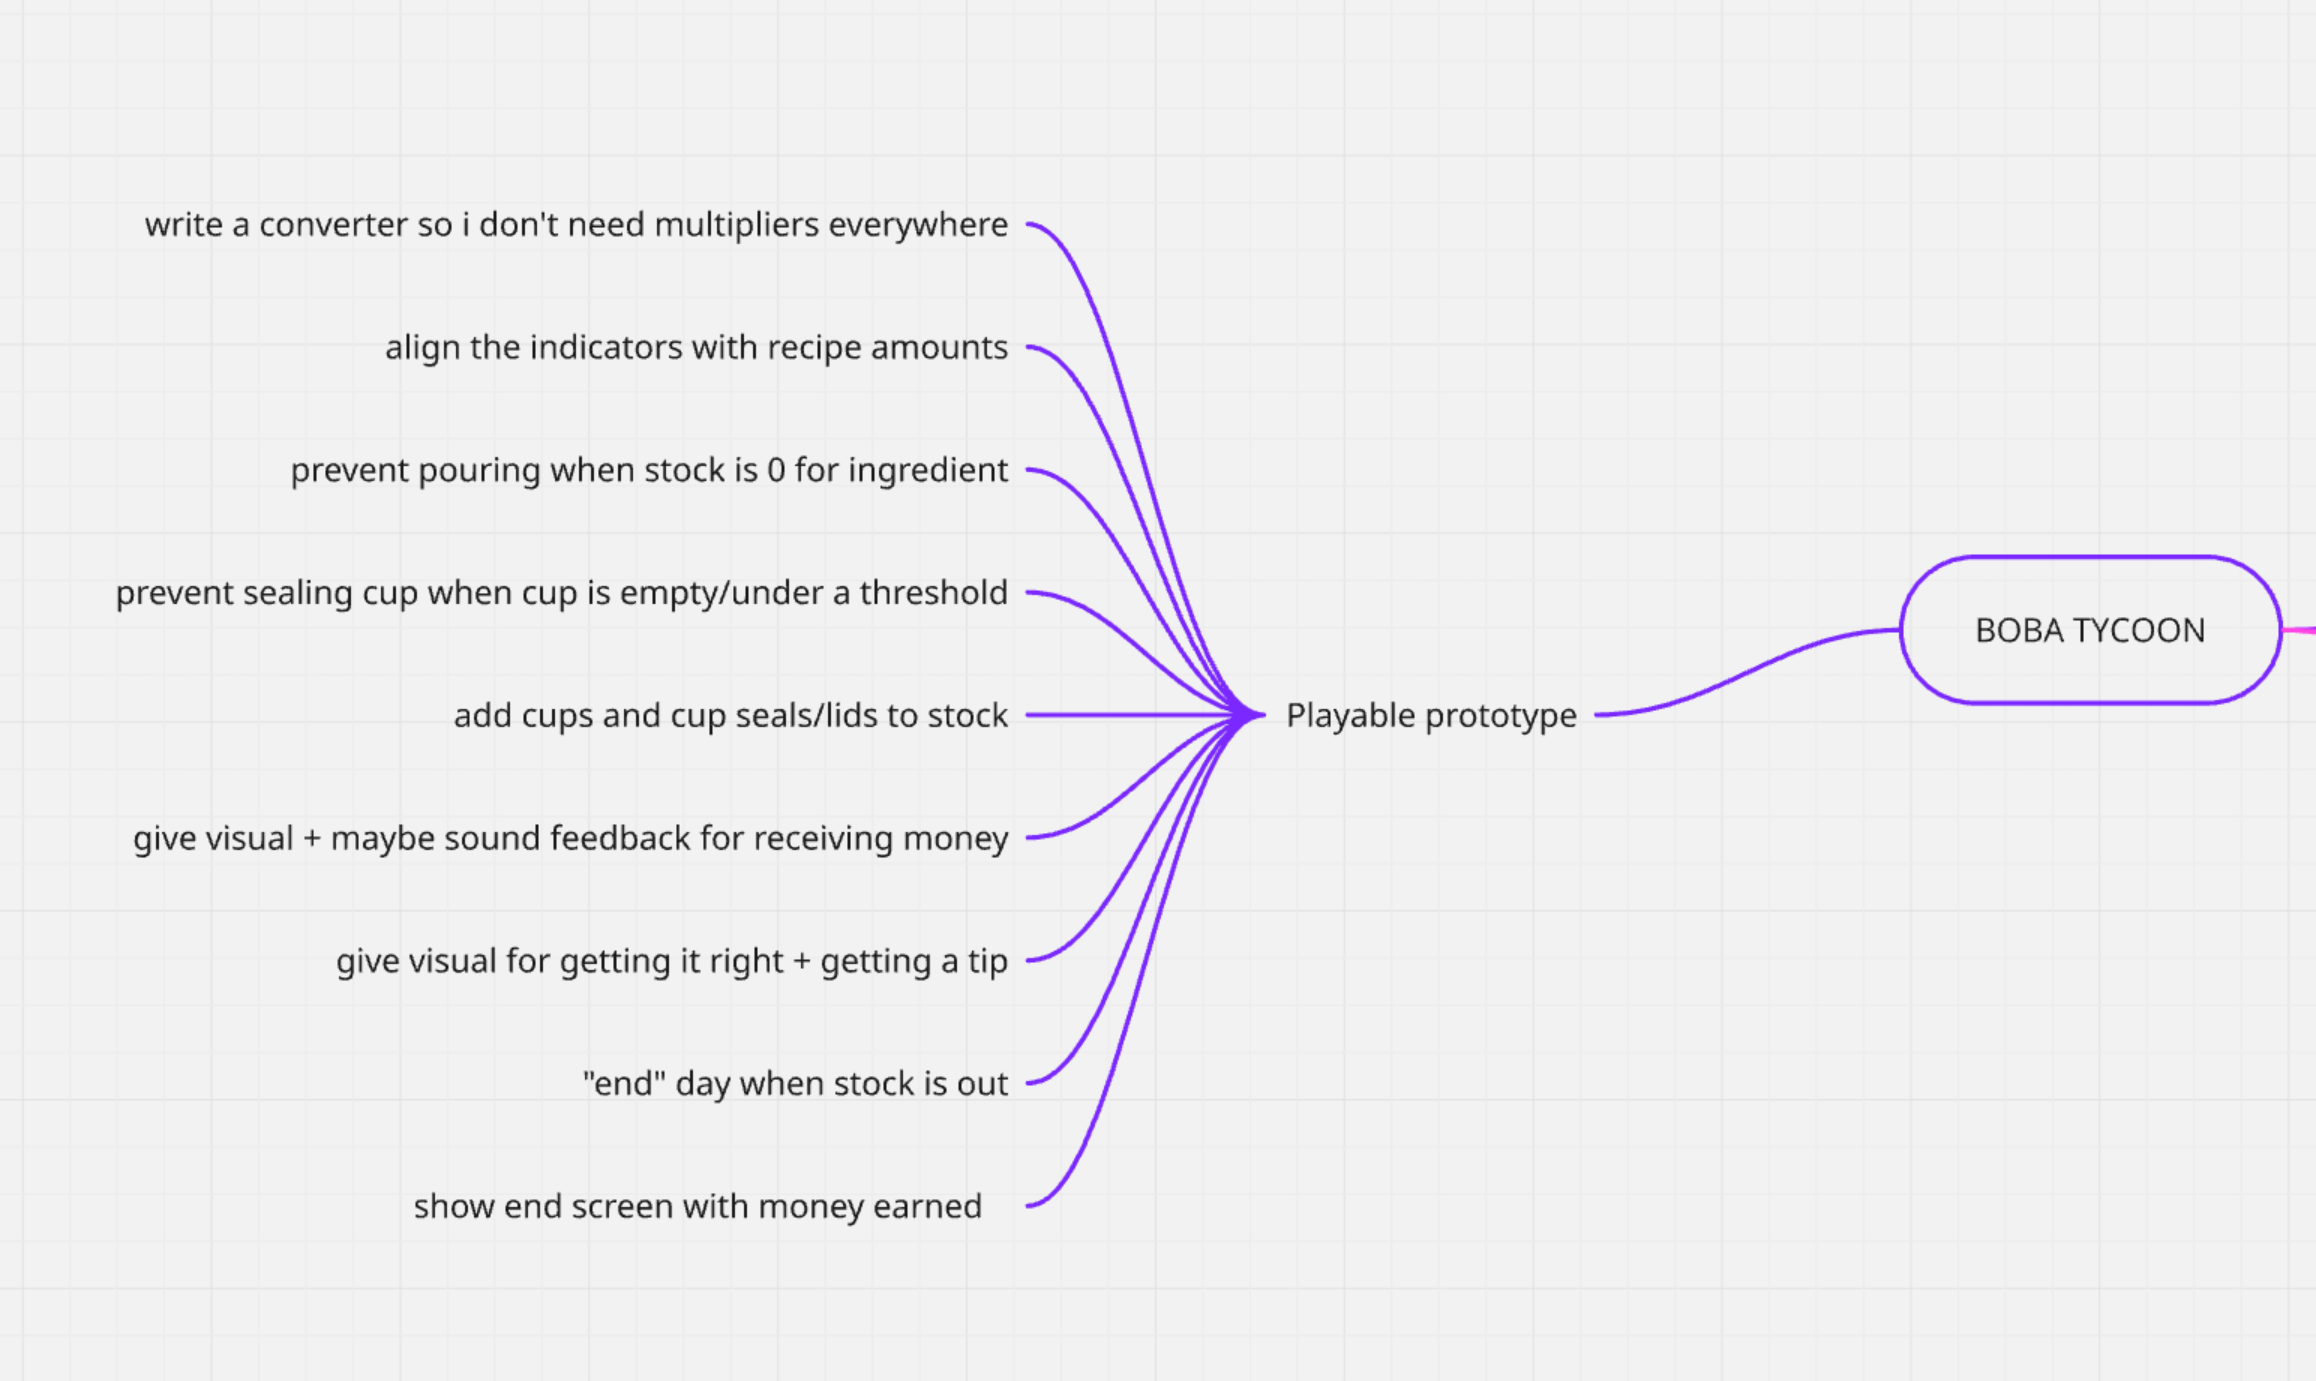
I’ll separate the rest of the list into what’s adding vs updating what I have:
| fix | add |
|---|---|
| write a converter so i don’t need multipliers everywhere | add cups and cup seals/lids to stock |
| align the indicators with recipe amounts | give visual + maybe sound feedback for receiving money |
| prevent pouring when stock is 0 for ingredient | give visual for getting it right + getting a tip |
| prevent sealing cup when cup is empty/under a threshold | “end” day when stock is out |
| show end screen with money earned | |
It’s time I move these to a planning app! I was going to go with Monday.com for this one - Trello is nice, but has been a bit basic for my needs. Codecks was also recommended in the discord server, and seems like a great way to work with a team and also show your progress to your community if you have one.
But!!
I actually re-watched a video I saw a year ago by JamieDev on her workflow and I’d like to try the mind mapping because it makes you break down tasks. To Miro first, because its free and I’m not working with anyone else on it!
If I had recalled that one before yesterday maybe I would have seen my task “fix the slider, or have a custom hold and drag interface” and been able to break it down to see that it’s not simple 😂
I threw these into Miro:
Monday.com has an integration with mind maps that turn nodes into tasks - it sounds very appealing but it is paid so for now I’ll just see if I like this method at all.
I had a want for something that could turn TODO comments in my code into a mind map but thinking about it now I don’t know how you would mark them as done without leaving all the TODOs in there. Maybe them not being there is clean enough though. That’s a far in the future idea.
With a little bit of tweaking I have a more expanded plan:
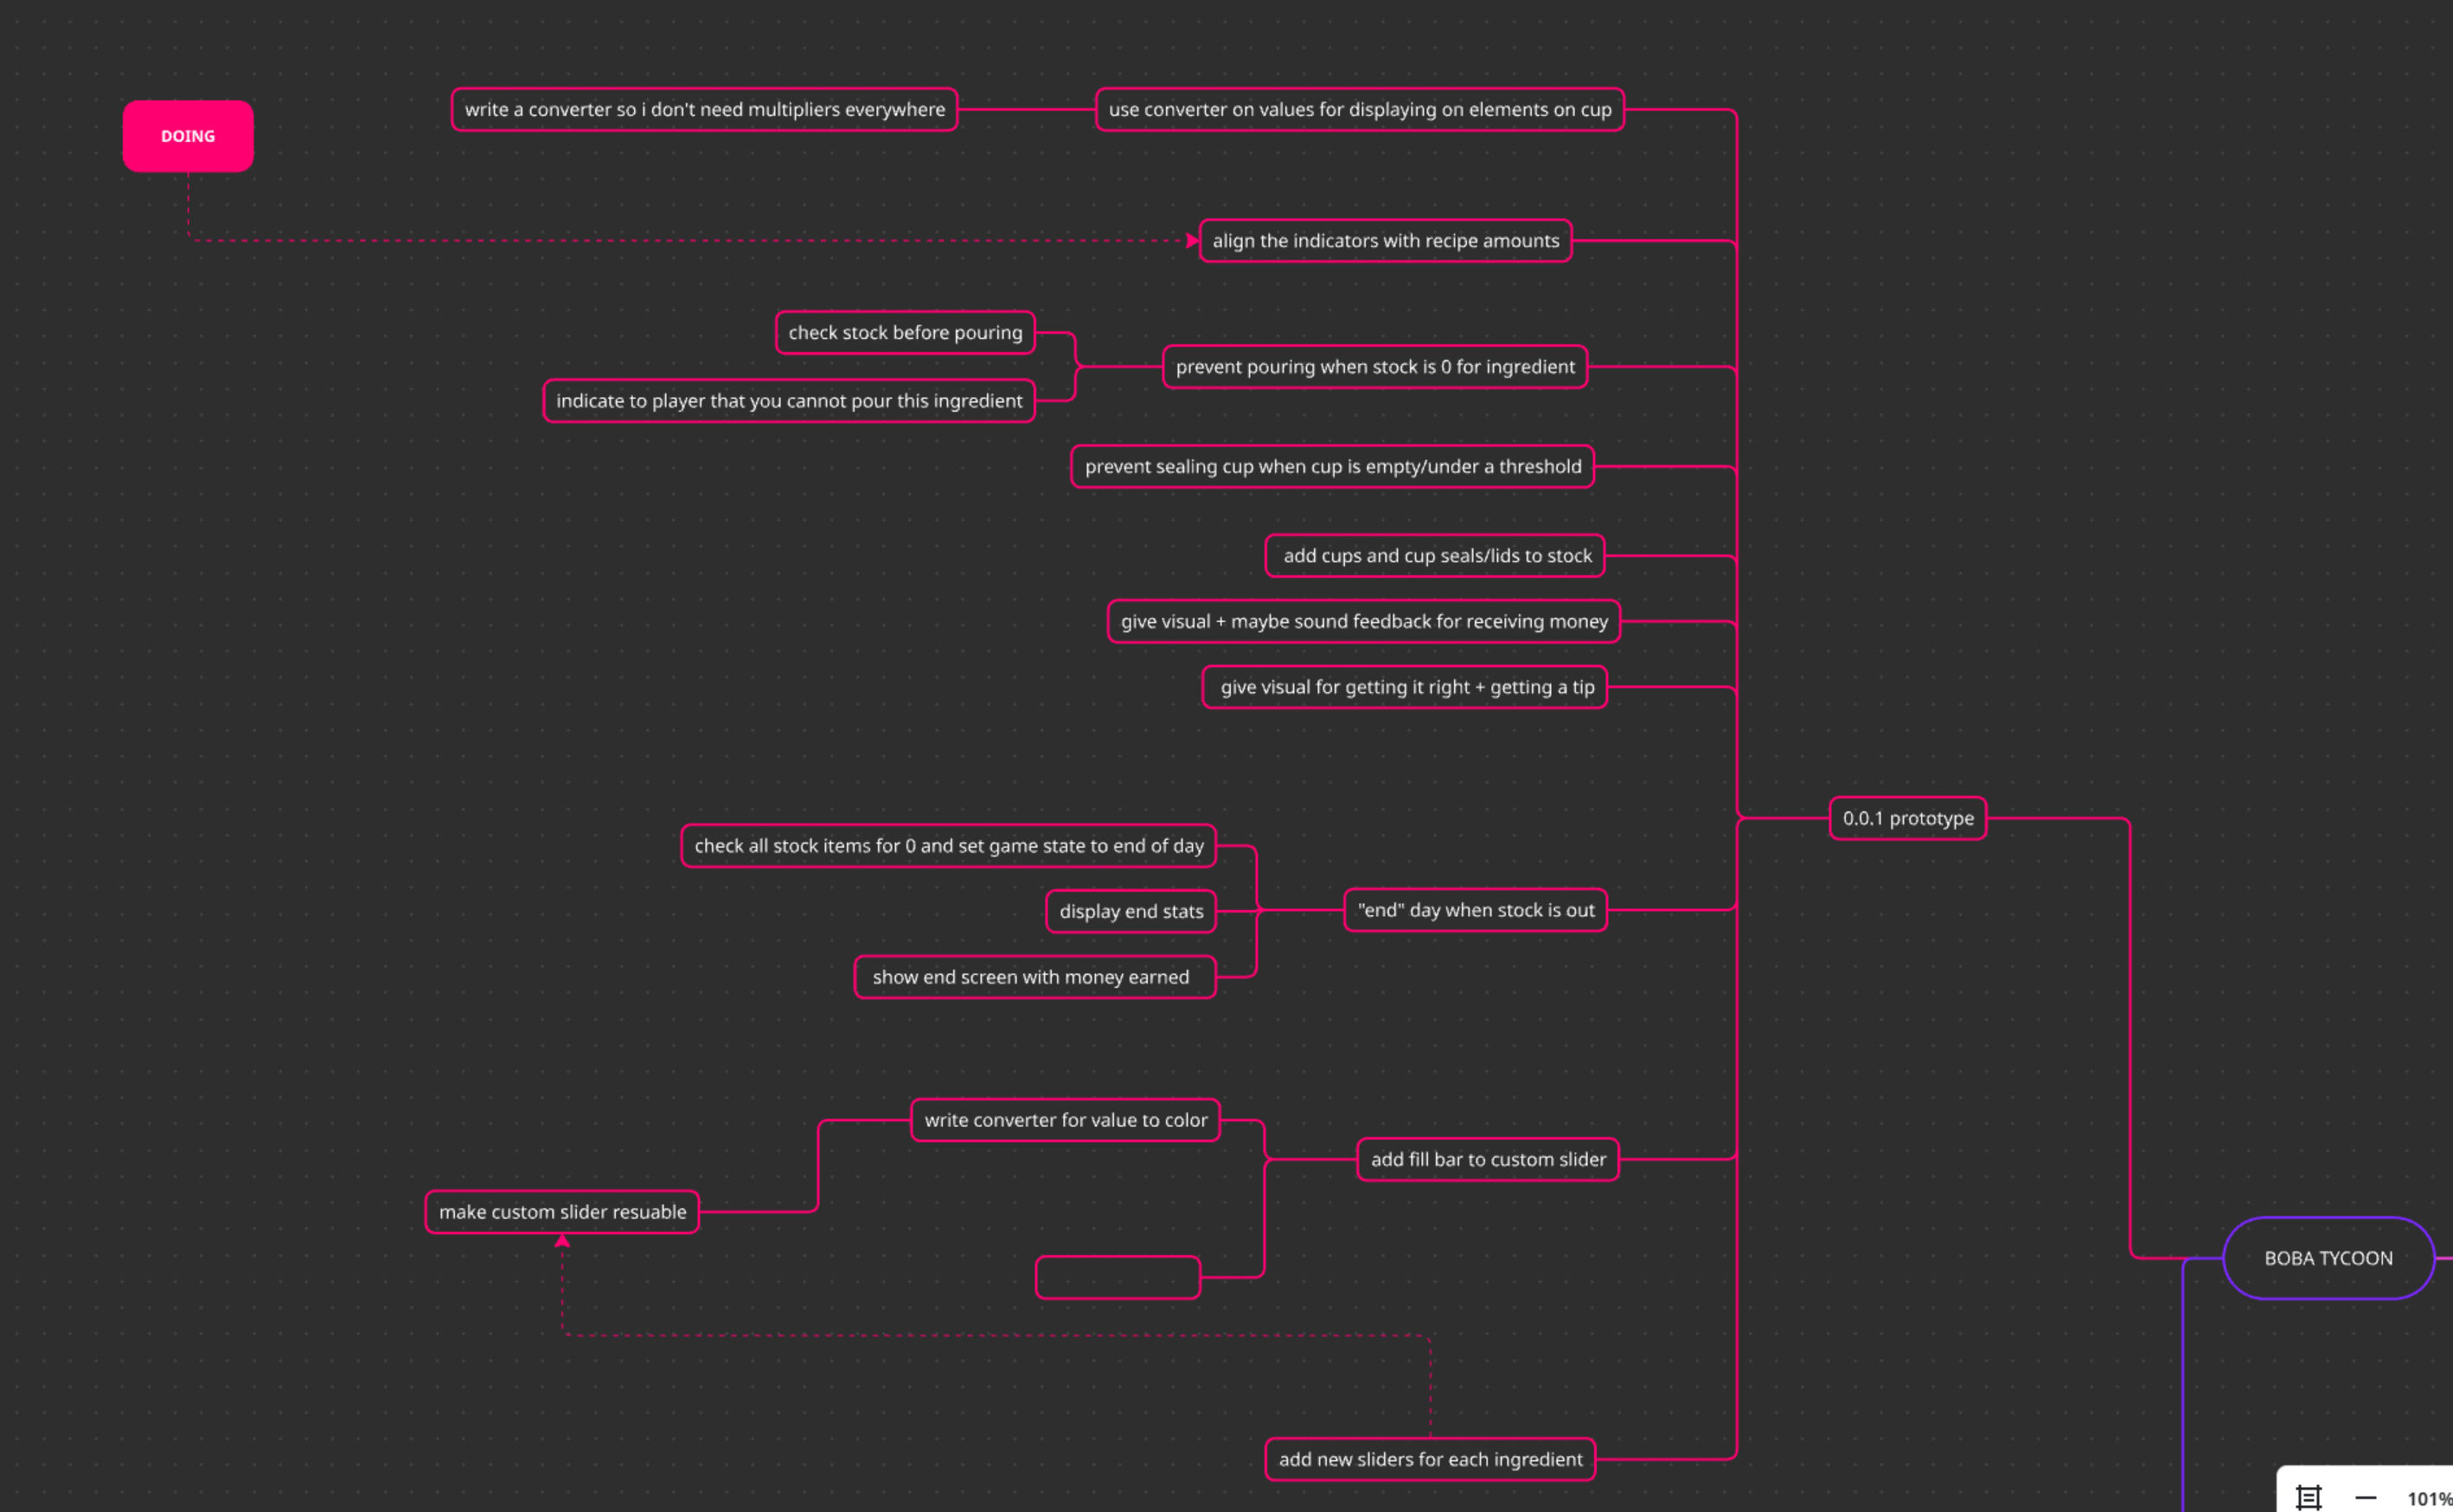
It’s nice to have a pretty planning tool to look at. That’s all for today! I got a lot done.